
Putting Adsense ads on your site is the simplest way to monetize your blog. Luckily for us, Google has made it pretty easy. Here’s a quick tutorial with screenshots on how to add Adsense to WordPress.
Step 1: Log in to your Adsense Account
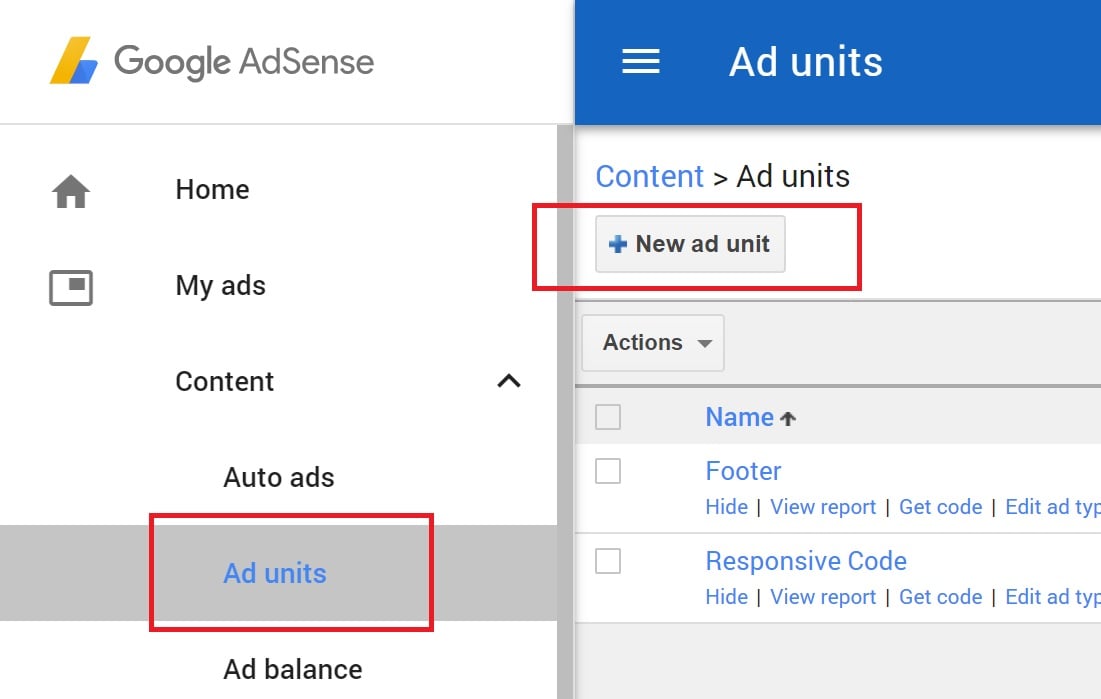
If you don’t have an Adsense account, create one here and navigate to My ads -> Content -> Ad units. Then click the “New ad unit” button as shown here:
Step 2: Choose the Ad Type you Want to Create
Google has a lot of different advertisements types to fit your blog. You can create multiple ads for each type. For example, you can choose between:
- Text & display ads
- In-feed ads, and
- In-article ads
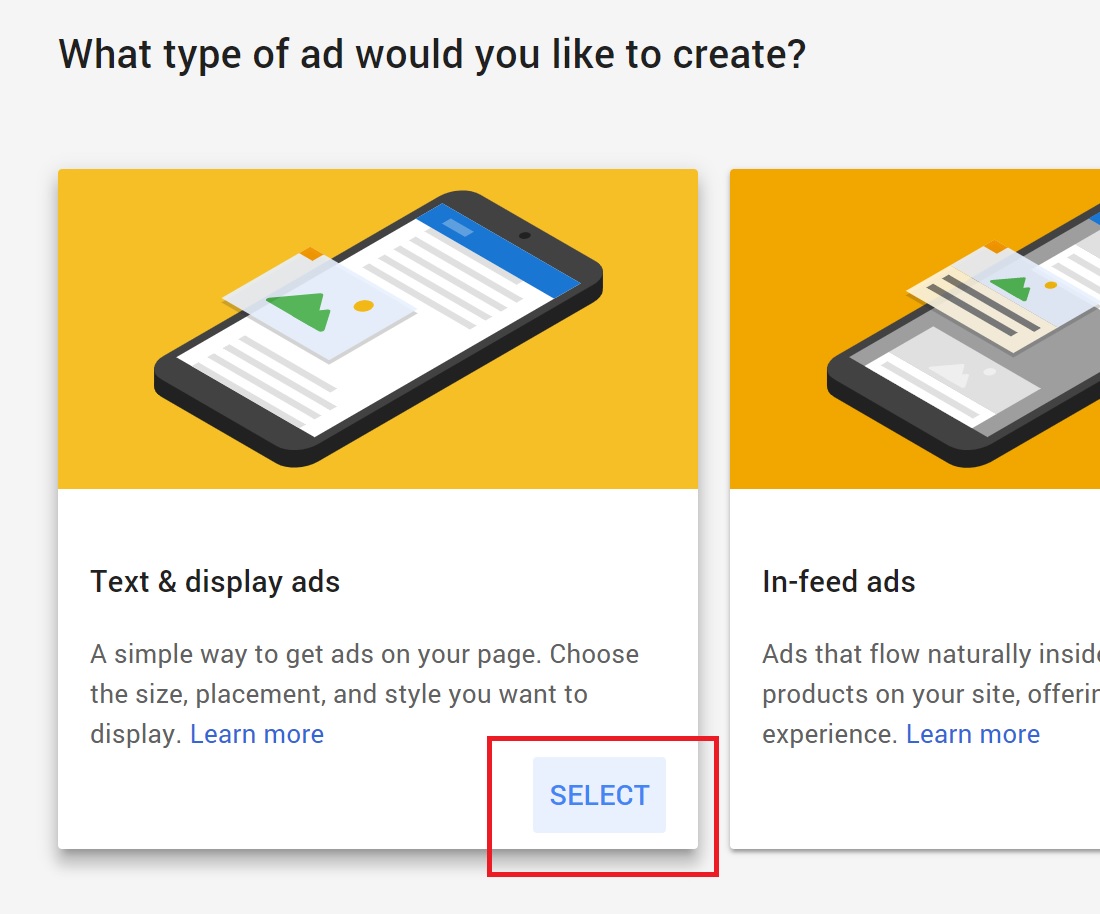
The first is the most common type. The second is great for inserting inside lists or products. The last is for “in-between” ads that fit inside content between paragraphs. For this tutorial, I’m going to create a “Text & display” ad. So I choose the appropriate option as shown here:
Step 3: Give your Ad a Name and Choose a Size/Shape
In the “Name” section of the next screen, give your ad a descriptive name that you can refer to later on:
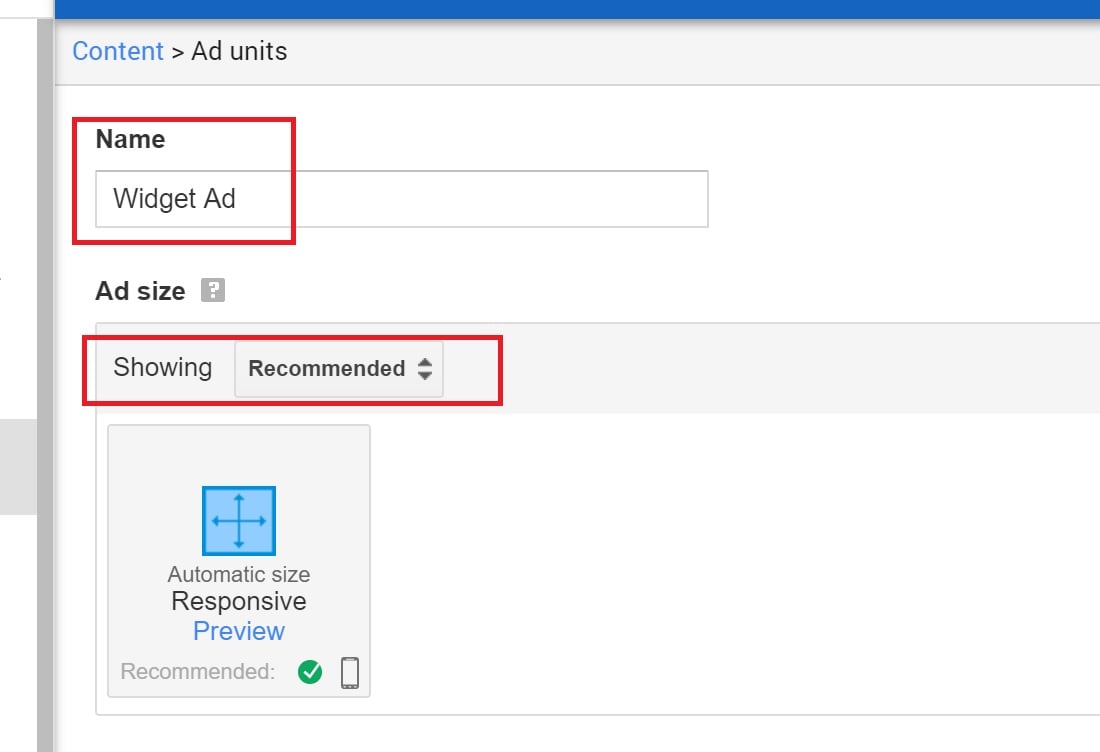
Also, you can choose the “shape” of the ad. For example, you might want a horizontal banner ad to place at the top or bottom of your screen. Or you can choose a horizontal ad for your sidebar. Or perhaps something rectangular.
Alternatively, you can ask Google to choose an ad for you. This is especially great for responsive websites where you want your advertisement to be visible on all device sizes. This option is great when you want general purpose code that you can use everywhere. And that’s what I choose in the above example.
Step 4: Select your Color Scheme
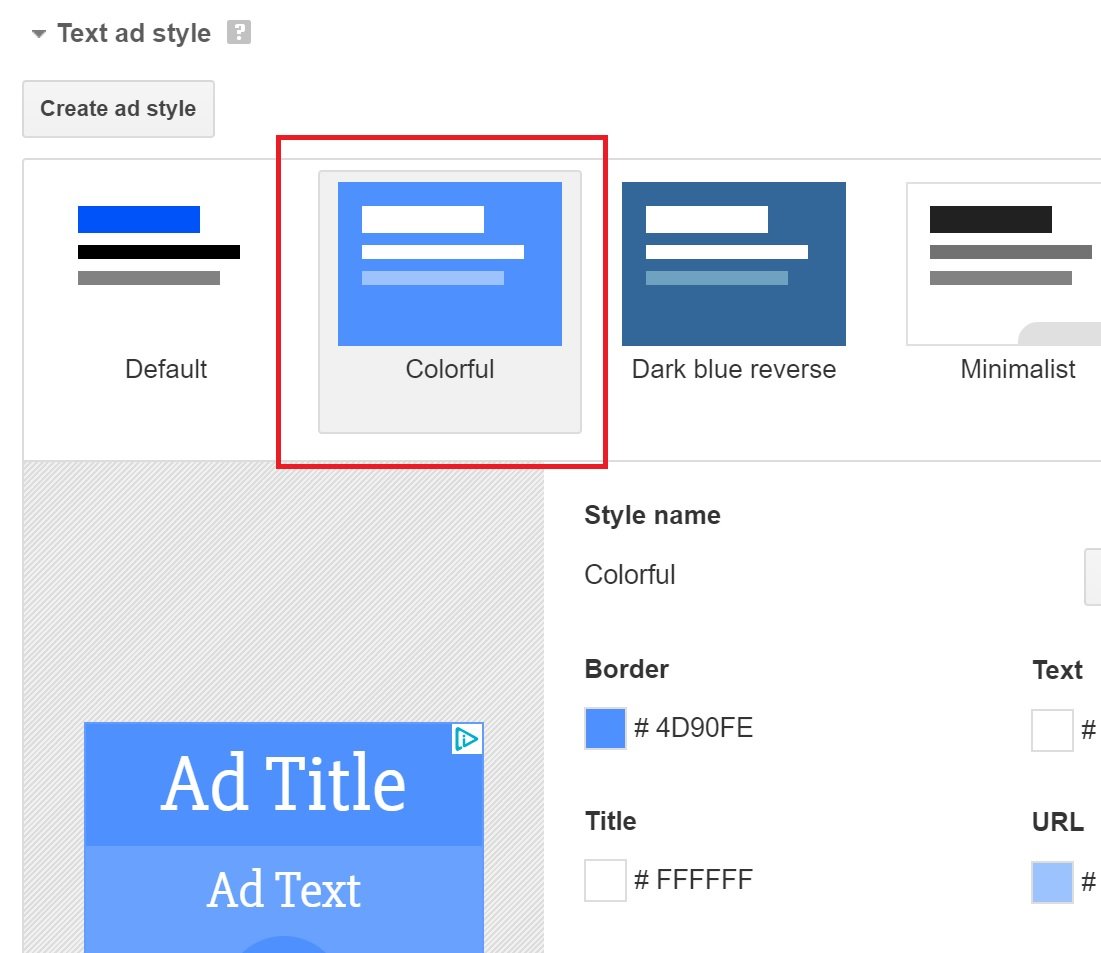
Next, choose the kind of color scheme you want your ad to have after expanding “Text ad style”. You can choose from the selection of pre-built styles, and even customize them further to suit your needs:
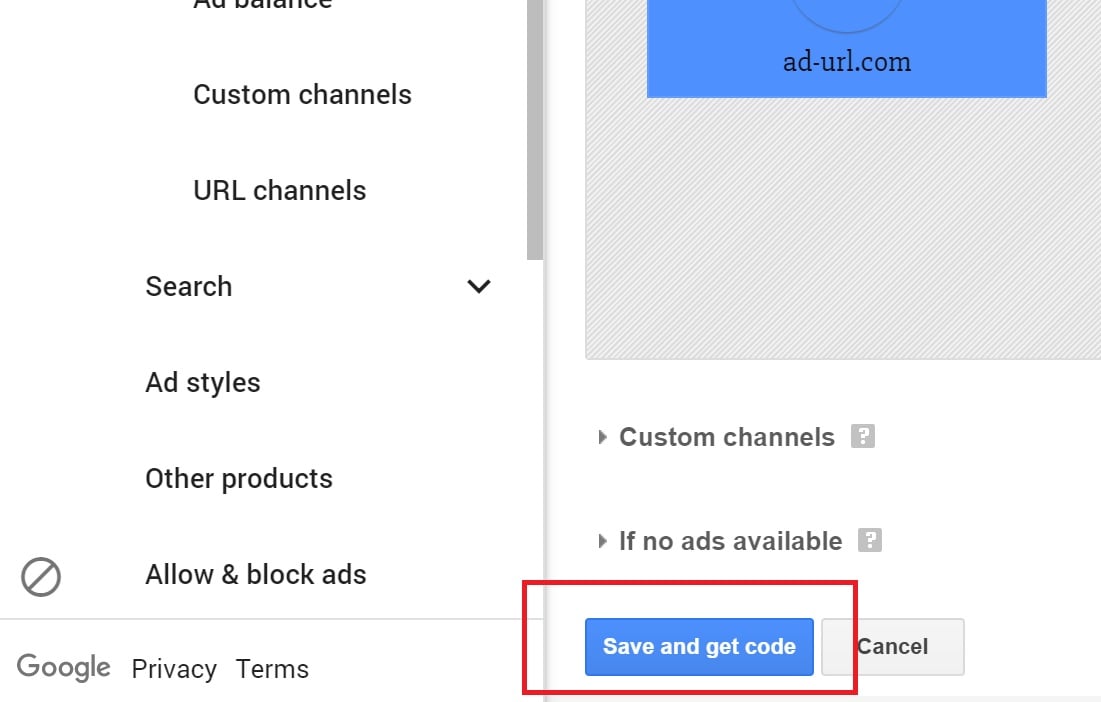
You can also input further optional details like what to show if no ads are available, and group your ad with pre-defined custom channels for easier reporting. Once you’re satisfied, click “Save and get code” as shown here:
Step 5: Copy Code and Insert into WordPress
Clicking “Save and get Code” will show you the code you need to insert in a box like this:
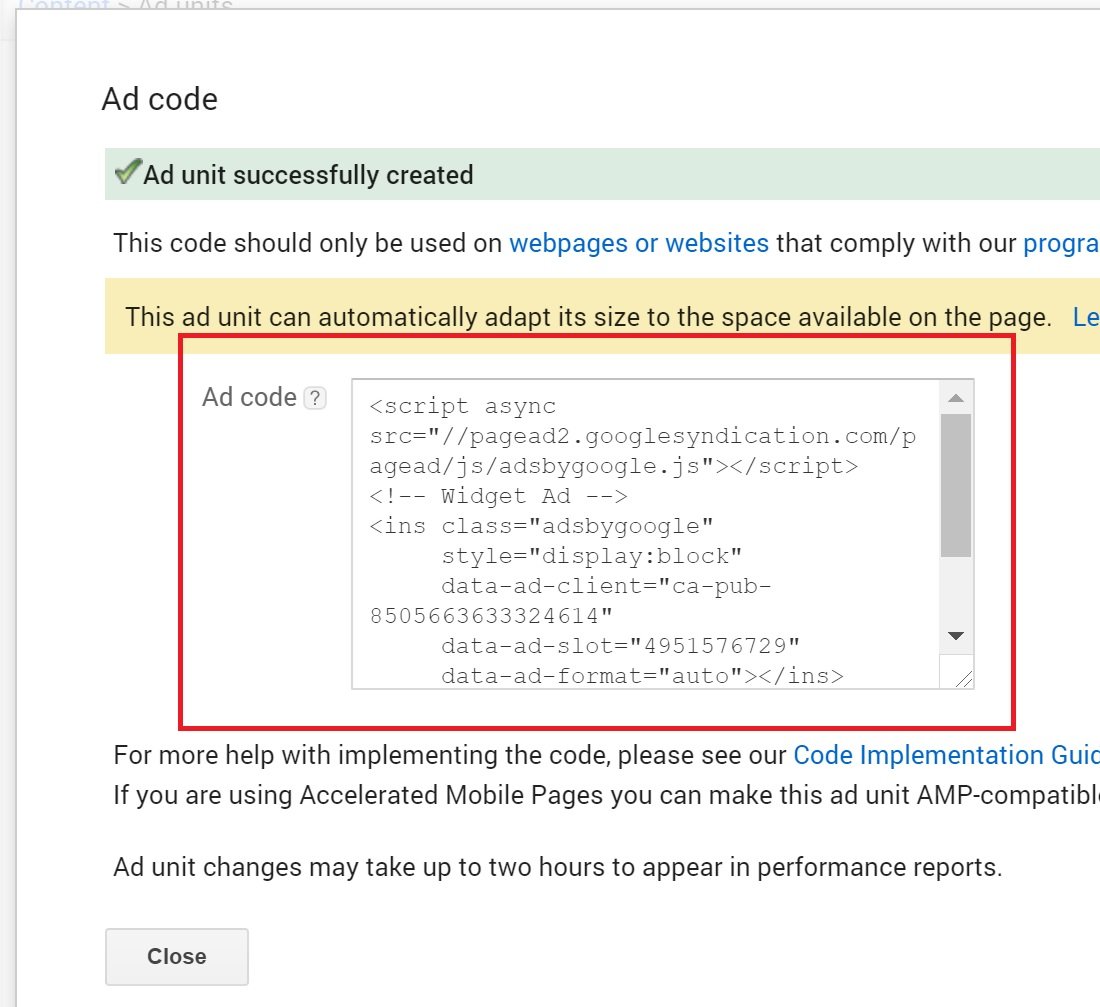
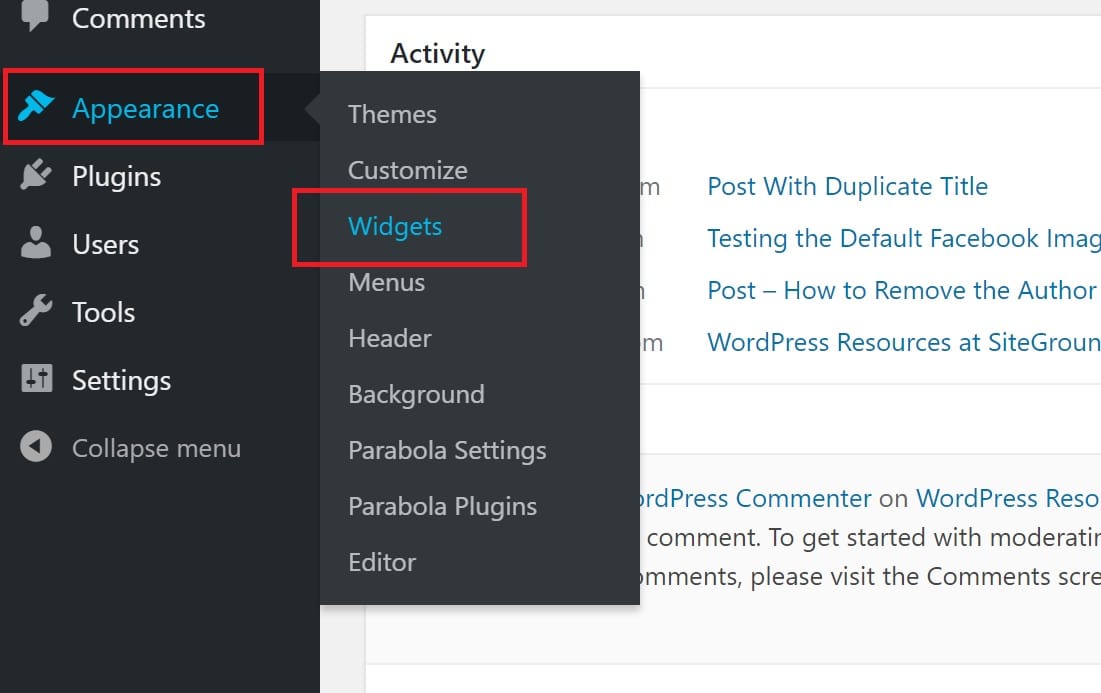
Click on this code to select it and copy it to your clipboard. Now you need to place this code somewhere. For this tutorial, I’m going to add it to a sidebar widget. So go to the WordPress dashboard and click Appearance -> Widgets as shown here:
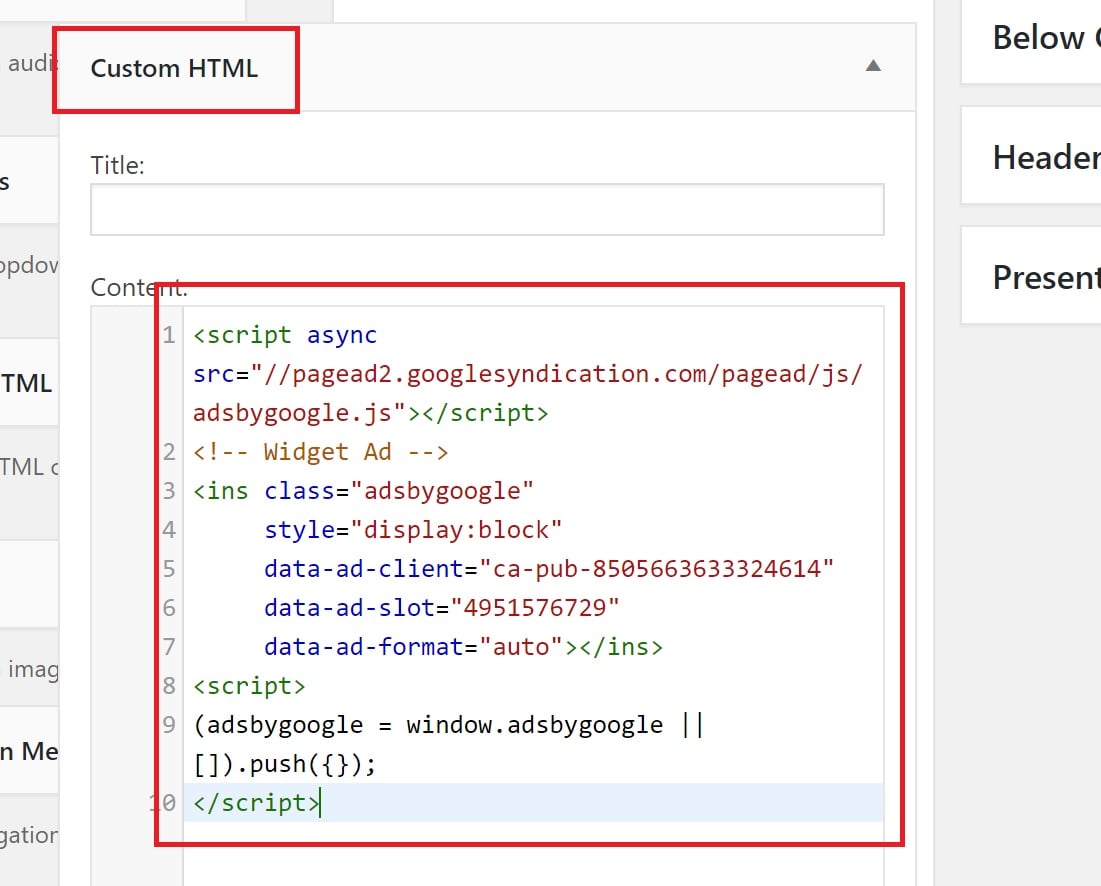
Now select the “Custom HTML” widget from the list of widgets and drag it to your sidebar where you want the ad to display. In the “Content” box, paste the code you obtained at the beginning of Step 5.
Save this widget and reload your page. Now you should see Adsense ads appear in that location as shown here:

So this is how to add Adsense to WordPress. Site back and enjoy the ad revenue! For best results, your WordPress site needs to load as quickly as possible. For this purpose, you might want to consider specialized WordPress hosting services, instead of the regular shared hosting plans. Here’s a pricing comparison of the WordPress hosting plans from major service providers.
Speak Your Mind