
Note: After a long time, I’ve stopped recommending SiteGround in favor of NameHero. It wasn’t an easy decision, but I stand by it. Renewal costs, and the recent changes to cPanel were some of the reasons. Here’s a detailed explanation for why SiteGround is no longer my preferred web host.
SiteGround hosting comes with built-in e-mail access with all its plans. Each has its own quota and limitations. Here a comparison of allotted mailbox resources with each plan:
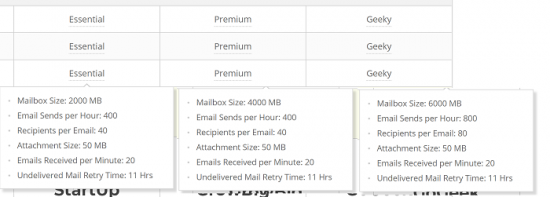
Here’s a link with the complete list of plans along with the appropriate SiteGround coupon for maximum discounts on hosting. You can access SiteGround webmail in two ways. Directly via a special link, or with cPanel. In this tutorial, I’ll show you how to do both.
Step 1: Make Sure You’ve Created an E-mail Account!
To send and receive messages from SiteGround webmail, you have to set up an e-mail ID first. To do this, log into cPanel using any one of these URLs:
example.com:2083
example/cpanel
cpanel.example.com
example.com:2082
Replace “example.com” with the name of your site or domain. These are the cPanel login details for most major hosting providers (except for GoDaddy – there’s no direct URL for that).
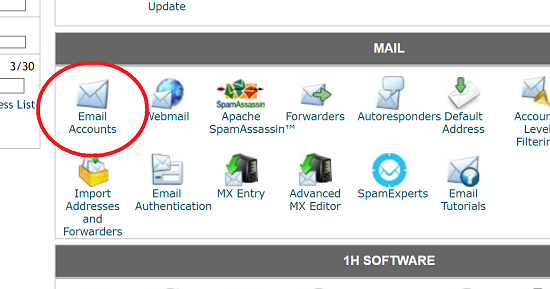
Once you’ve logged into cPanel, scroll down to the “Mail” section and click “Email Accounts” as shown here:
On the following screen, create an e-mail account and fill in the details:
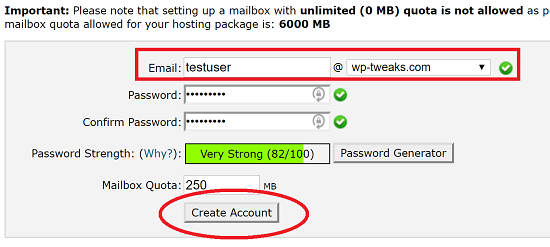
SiteGround imposes pretty strong restrictions on the password strength. So make sure it’s got letters, numbers, a couple of special characters, and you should be fine! Click “Create Account” to complete the process.
Now you’re ready to send and receive e-mail from this e-mail ID.
Step 2: Logging in to SiteGround Webmail Through cPanel
The first (and most straightforward) way to access SiteGround Webmail is from within cPanel itself. You’re already there after creating an e-mail account in Step 1 anyway. In the same “Mail” section, click the “Webmail” icon as shown here:
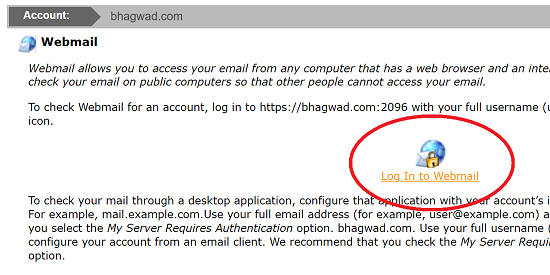
Now you’ll come to a page where you click a link to log in. Since you’ve already supplied your credentials to cPanel when you logged in the first time, you don’t need to do it again here. The first time you visit, you’ll be presented with a choice of SiteGround webmail clients. Choose one of them as the default:
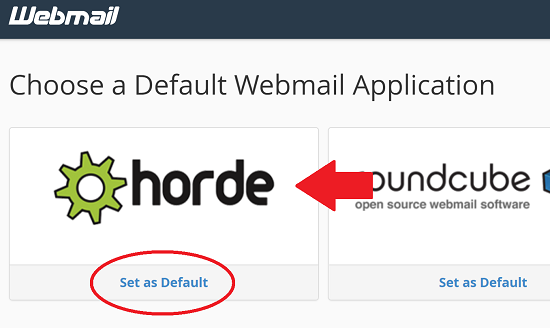
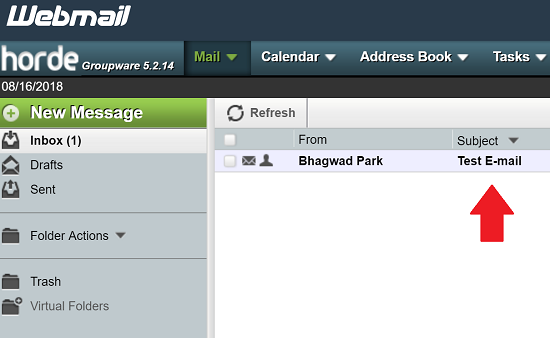
I personally always choose Horde since that’s what I’m familiar with. But you can select another if you like. After that, click the main icon and you’ll be logged in to your SiteGround webmail account!
You can see that I’ve already sent myself an e-mail to “testuser@wp-tweaks.com” for purposes of this tutorial and I’ve received it in my inbox.
So that’s method 1. Now let’s look at method 2.
Step 3: Logging in Directly to Webmail without cPanel
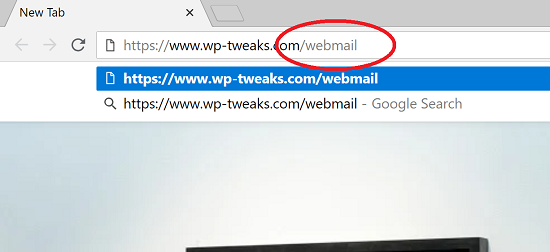
We can also access SiteGround webmail through a special URL that’s linked to our domain name. Here it is:
example.com/webmail
Replace “example.com” with the name of your site or domain. For example, here I’m accessing my webmail account through the browser:
Now you’ll be asked to log in to webmail. SiteGround requires you to access it with the e-mail ID and password that we set up in Step 1. This is why step 1 is so important! Without an e-mail ID, you can’t log in directly to SiteGround webmail.
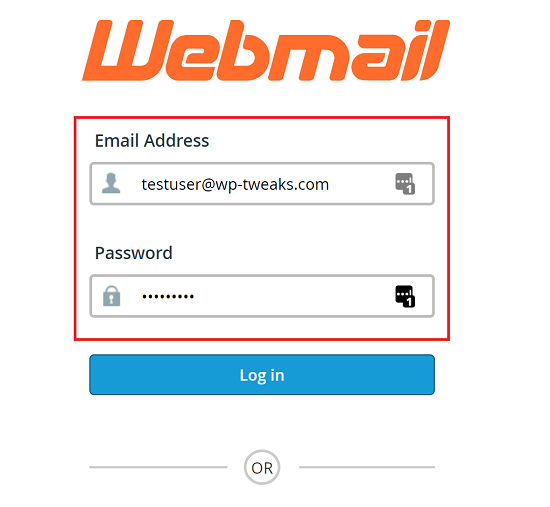
Supply the credentials you created in step 1 and you should be through! You can now send and receive e-mails just like in Step 2.
Which One Should You Use?
Well, obviously if you’ve already logged into cPanel for some reason it’s easier to just click “Webmail” from the dashboard. But if you want to access it directly from somewhere else, then the second method is easier.
Just keep in mind that method 2 requires e-mail and password authentication whereas method 1 just requires your regular cPanel and password credentials. Obviously, if you have a number of SiteGround webmail accounts for different people, you don’t want to give them access to cPanel! So method 2 is ideally suited in that scenario.
I hope you found this short tutorial useful!
Leave a SiteGround Review!
Help others by leaving a review for SiteGround web hosting. It’ll appear on my SiteGround review page.
Really no matter if someone doesn’t be aware of after that its
up to other people that they will help, so here it takes
place.