
If you want to access the files on your site, FTP is a great option. It’s easy to use, fast, you can upload and download files with ease, and perform most file operations with the click of a button. However, your FTP passwords and all subsequent data are transferred over the Internet in plaintext. Once you understand the dangers of this, you realize how irresponsible that is. Using those credentials, someone can easily take over your site – and then hasta la vista!
The alternative to plain FTP is SFTP. This is a secure connection between you and the FTP server that encrypts everything between the two end points. This tutorial will show you how to access your site over SFTP via the cPanel interface. The steps are similar to accessing your webpage through SSH.
Table of Contents
Step 1: Generate an SSH Key Pair in cPanel
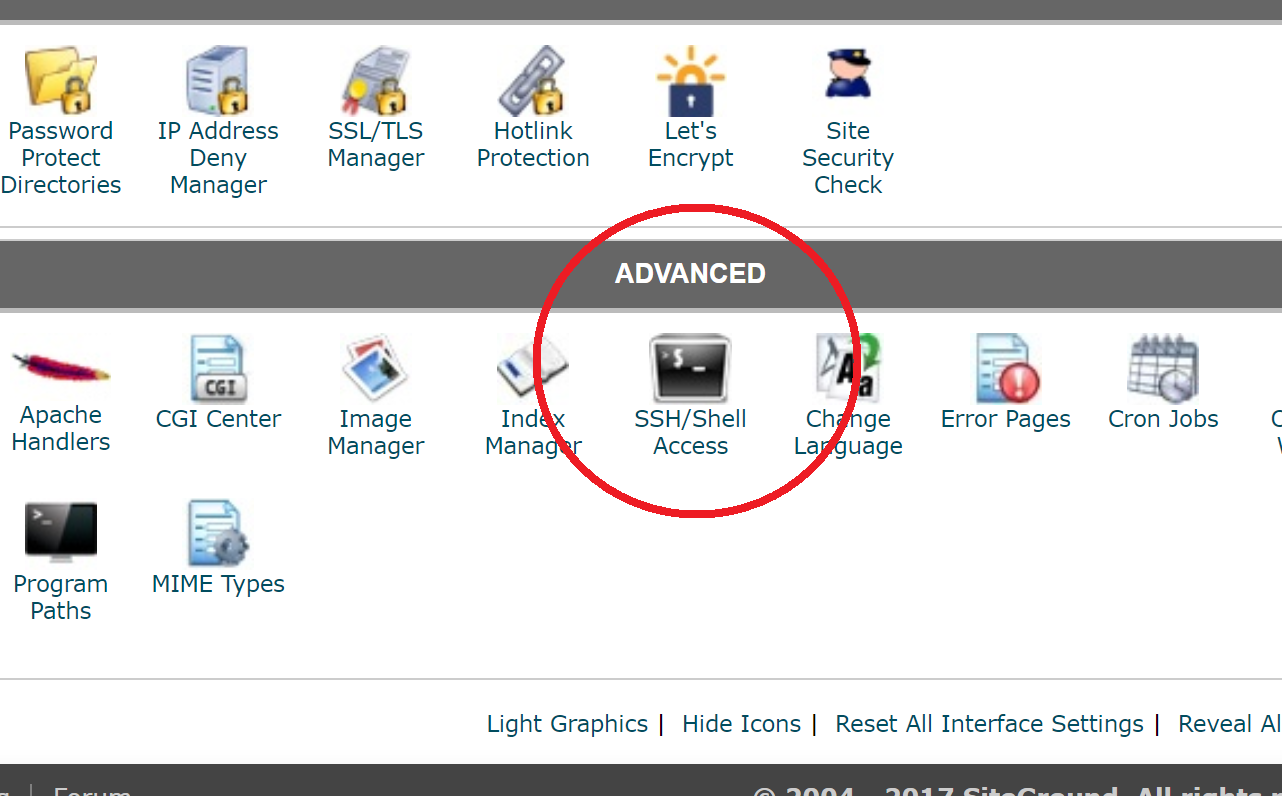
To get started, we need to first generate something known as an “SSH key pair”. Out of this key pair, we only need the “private” half of the key. We can do this from the cPanel interface. Log into your shared hosting cPanel interface and click “SSH/Shell Access”:
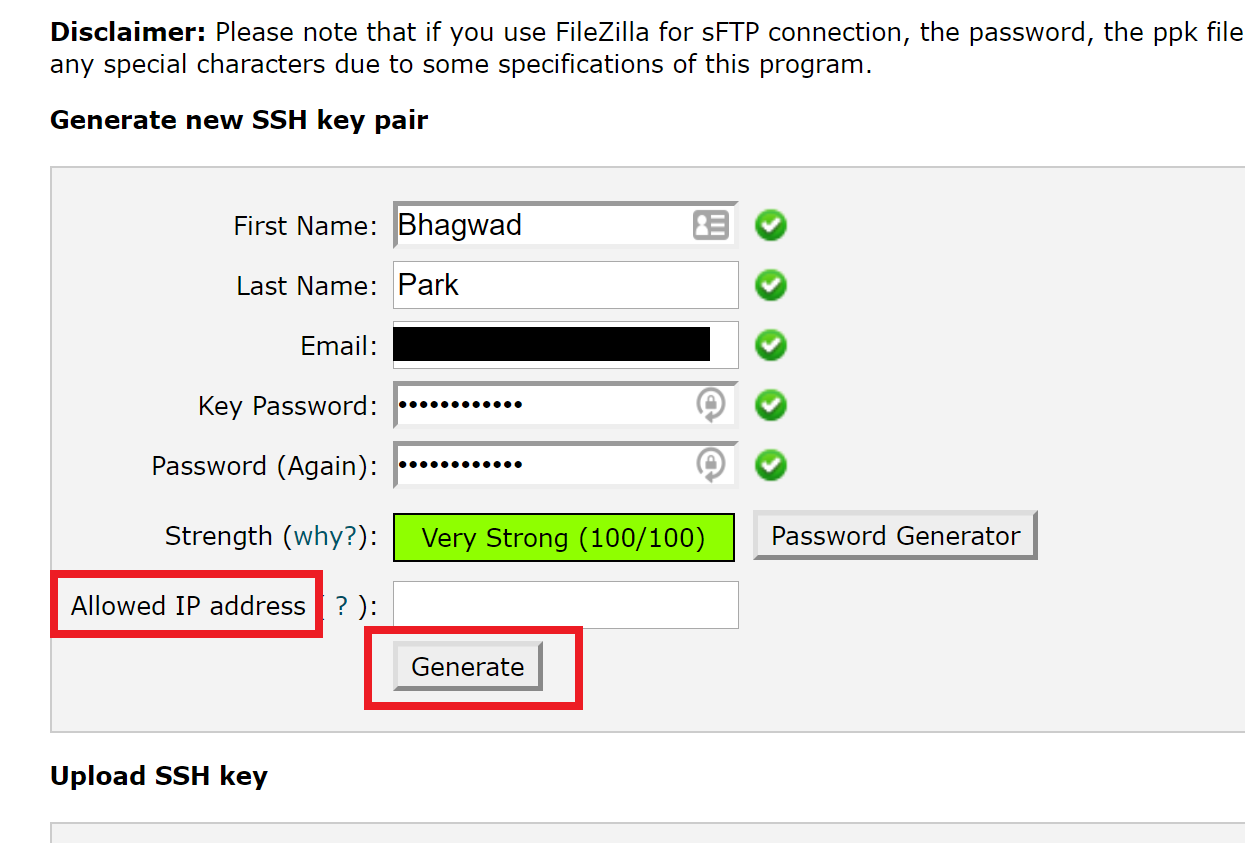
This will bring up the interface to generate a new SSH key pair. Enter the details as shown here. Sometimes you won’t be able to use a weak password. If you want to allow access to your server from anywhere in the world, and not just from specific IPs, leave the “Allowed IP Address” field blank as shown here and click “Generate”
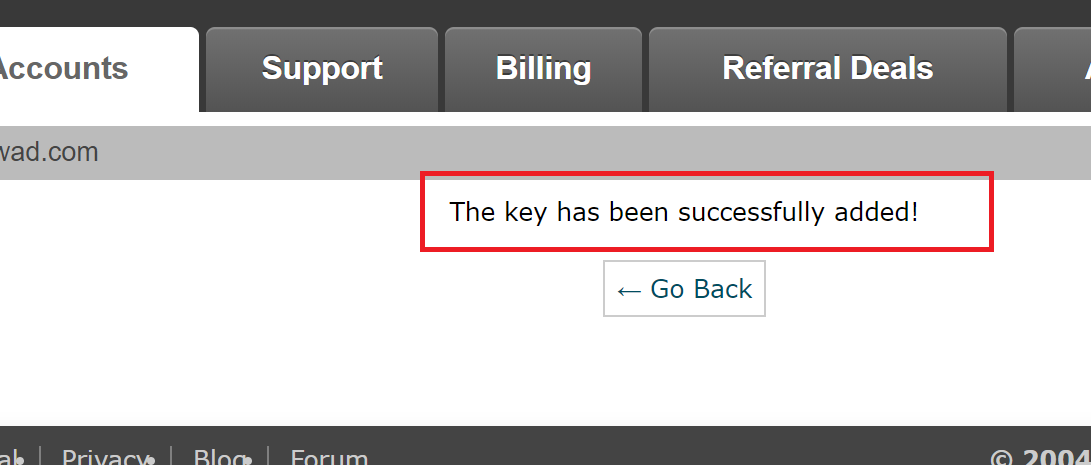
Once that’s done, you’ll get a message saying that your keys have been generated. Click the back button to return to the previous interface:
Now that you’ve generated your private key pair, it’s time to download it.
Step 2: Authorize the Public Key (Sometimes)
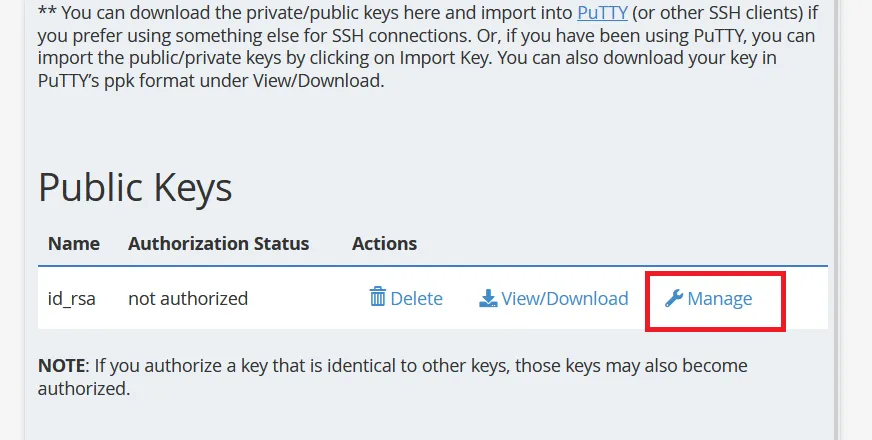
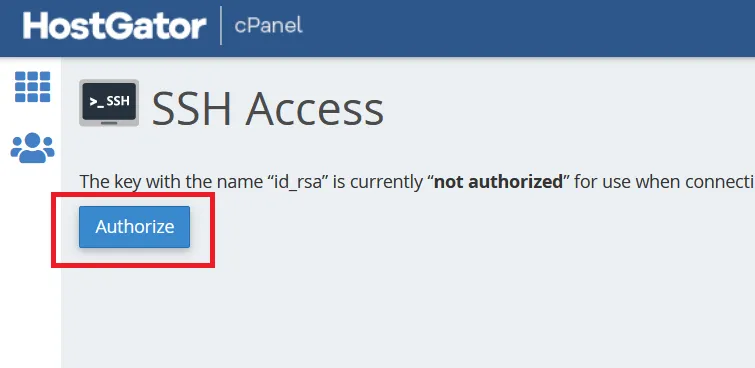
Some web hosts require you to authorize the public key before you use it. If this is the case, go to the previous screen and click “Manage” as shown here:
And in the next screen, click “Authorize”.
Click “Go Back” to return to the previous screen.
Step 3: Downloading and Saving your Private Key
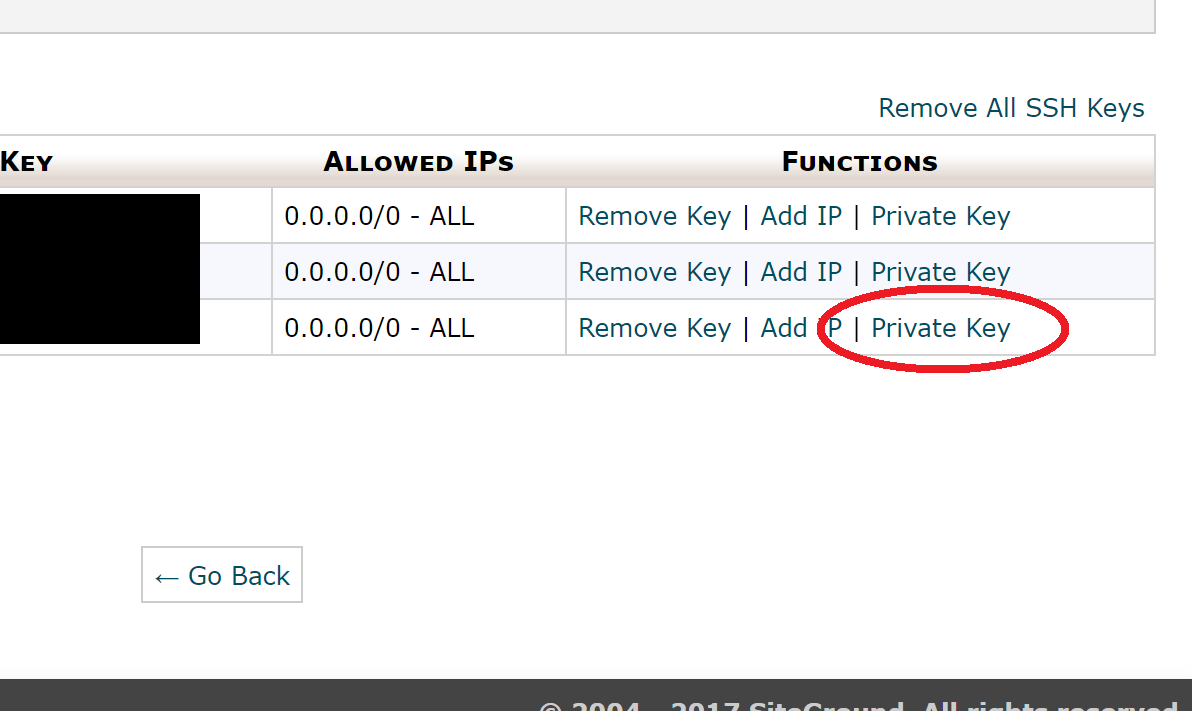
Scroll all the way down to the bottom of the page. Here you’ll see a table with all the key pairs you’ve generated so far. On the right-hand side of the table, you’ll see the “Private Key” link for the one you just created. Click that link.
This will display your private key to you. It’s nothing but a bunch of text including the –BEGIN RSA PRIVATE KEY– line as shown here:
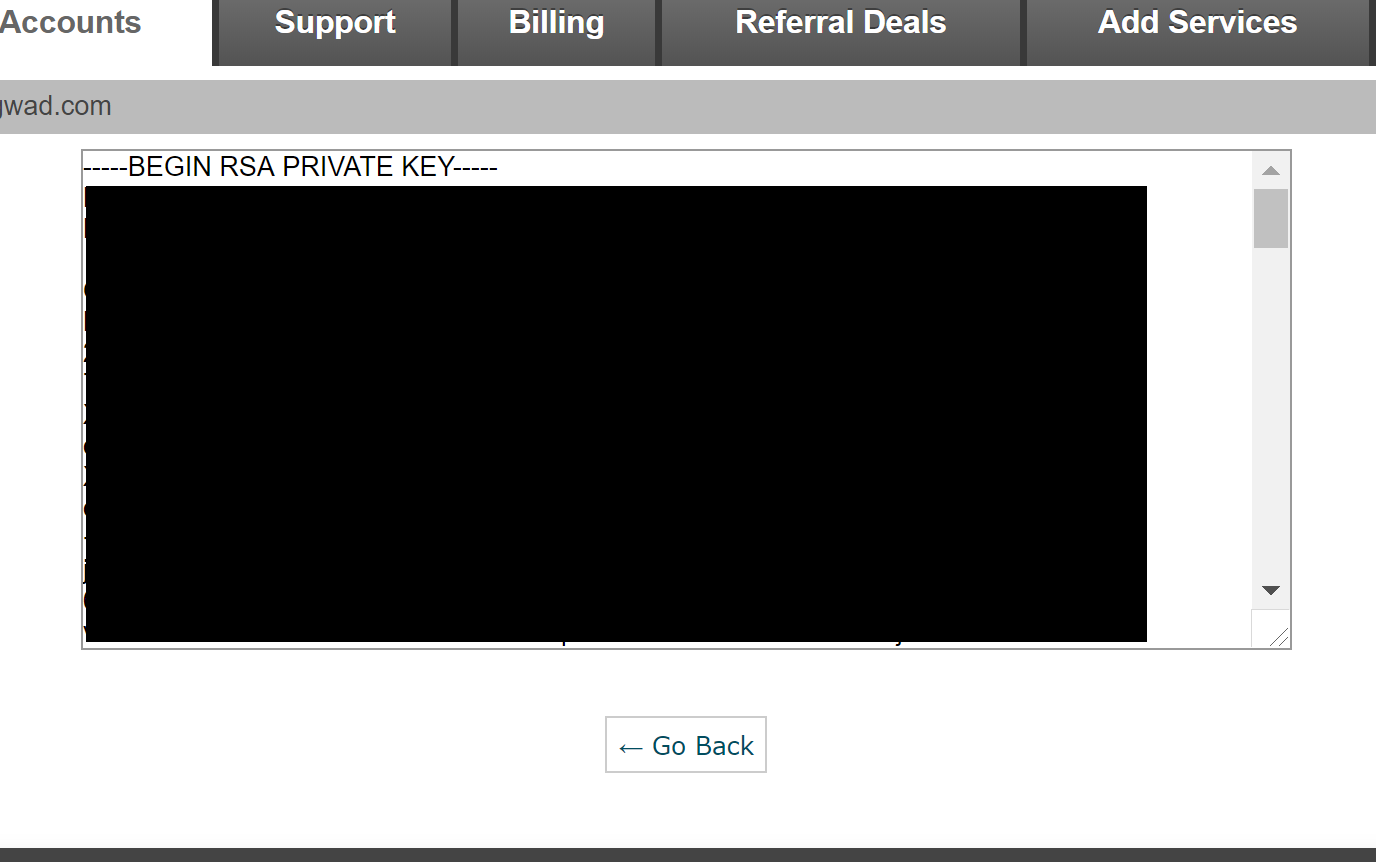
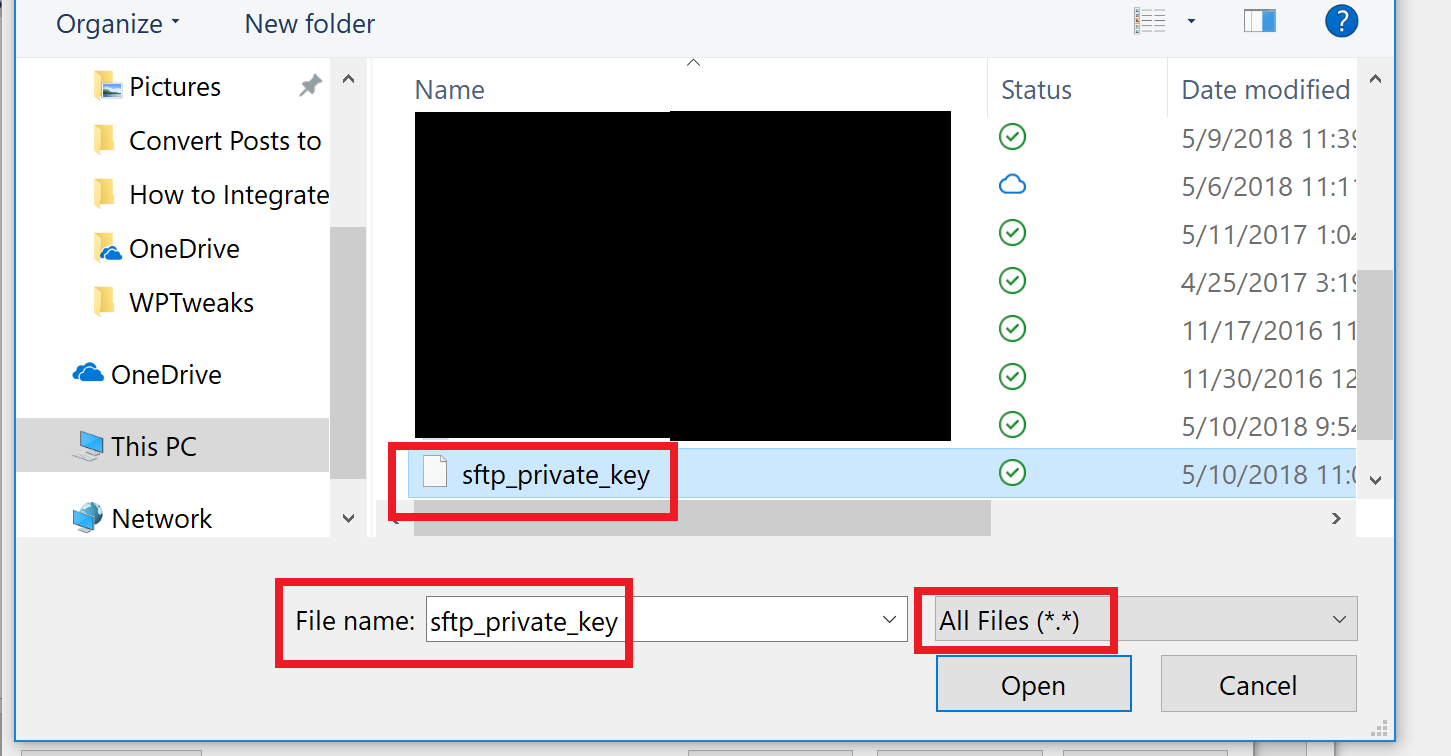
Copy the ENTIRE private key, paste it into a plain text editor like Notepad or Notepad++, and save it. In the screenshot below, I’ve used the filename sftp_private_key. There’s no need to give the file an extension yet.
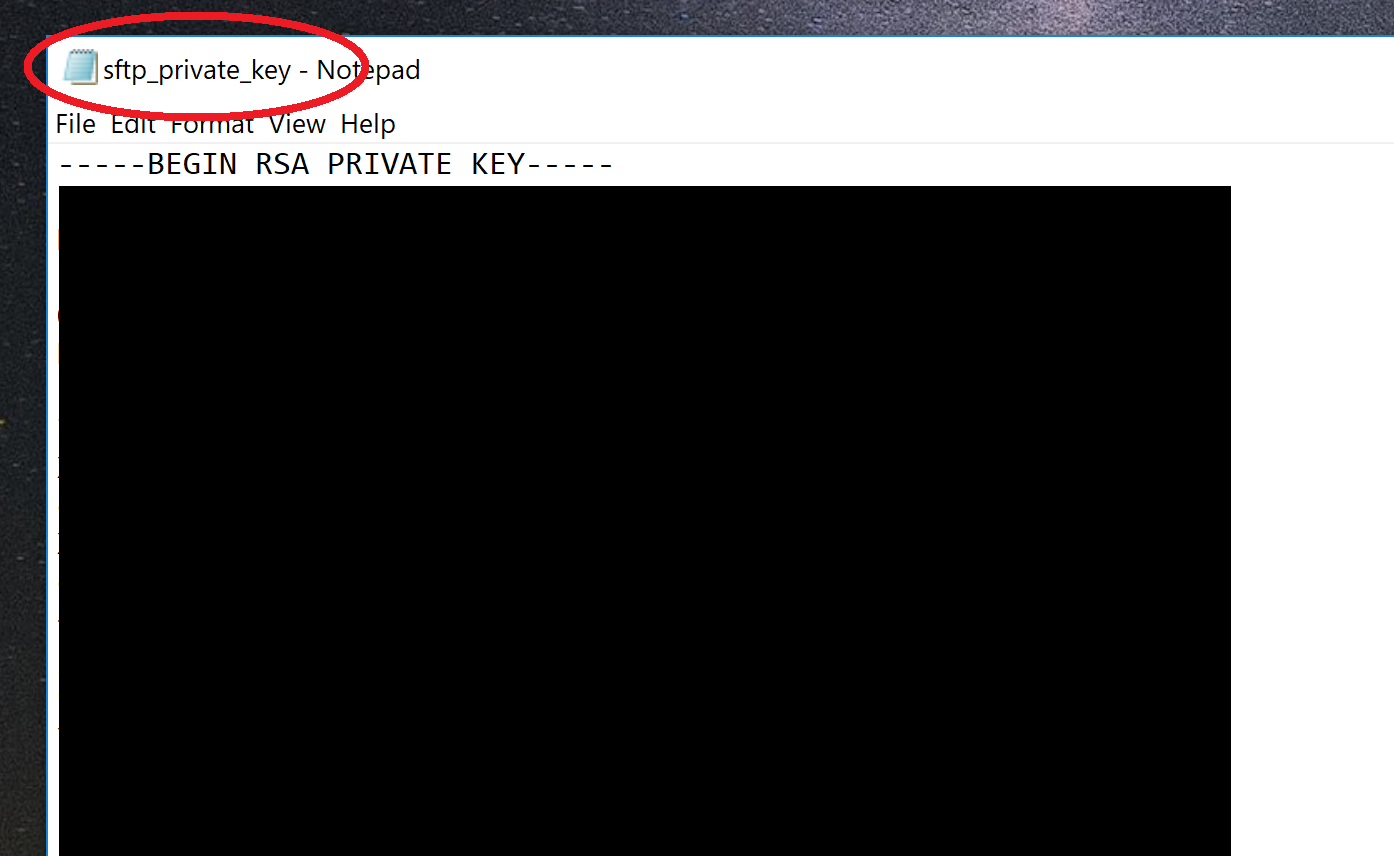
Save this file in a known location on your computer where you can access it later on. We’re done for the moment. Now let’s download WinSCP and get the information we need to use SFTP.
Step 4: Download WinSCP and Gather your Credentials
For FTP and SFTP, my preferred software is WinSCP. It’s an open source software application that runs on Windows. If you don’t have windows, you can read the instructions here and follow similar steps on your own FTP client.
Download WinSCP here and install it. Once done, you will need the following pieces of information to connect via SFTP:
- Your server hostname
- Your SFTP log in credentials
- Get the port number for SFTP
- The password you used to generate your private key in Step 1
- The private key file that you created in Notepad in Step 2
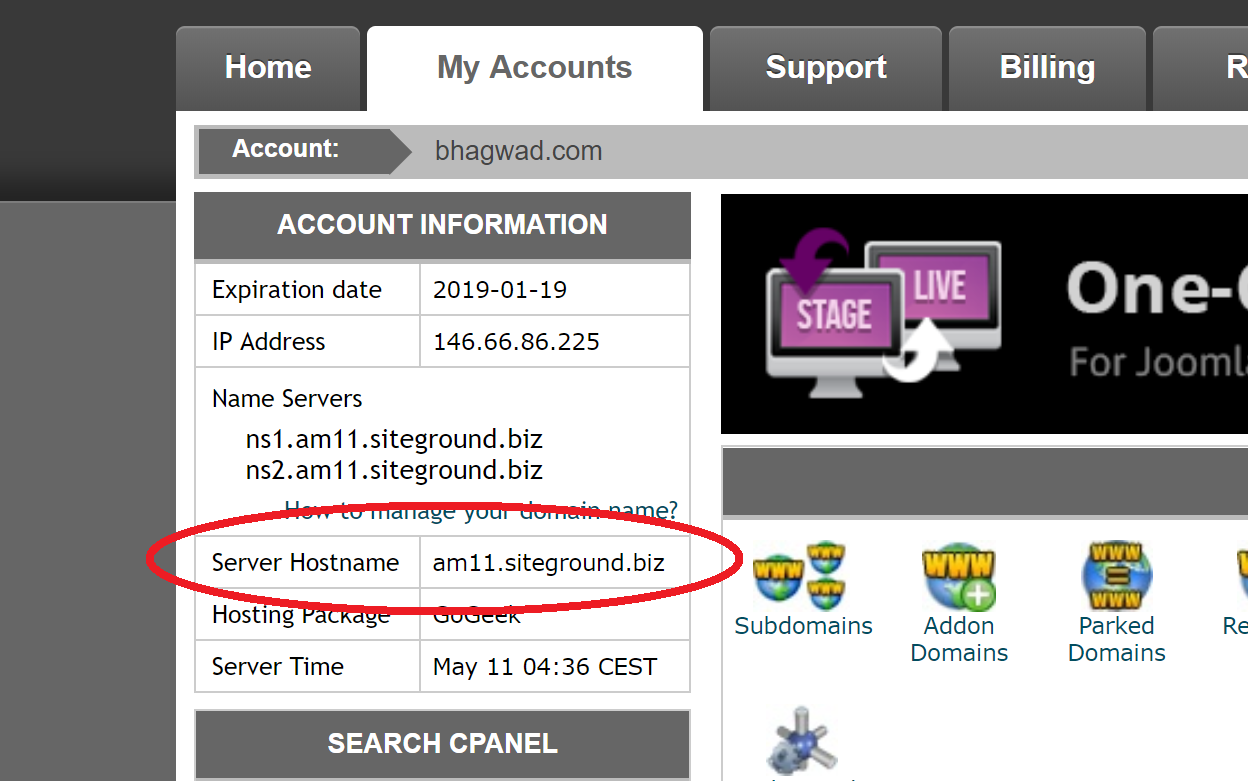
Find the Server Hostname in cPanel
You can get the server hostname after logging into cPanel. For an interface like that of SiteGround, you can find it on the left hand side of your dashboard as shown here:
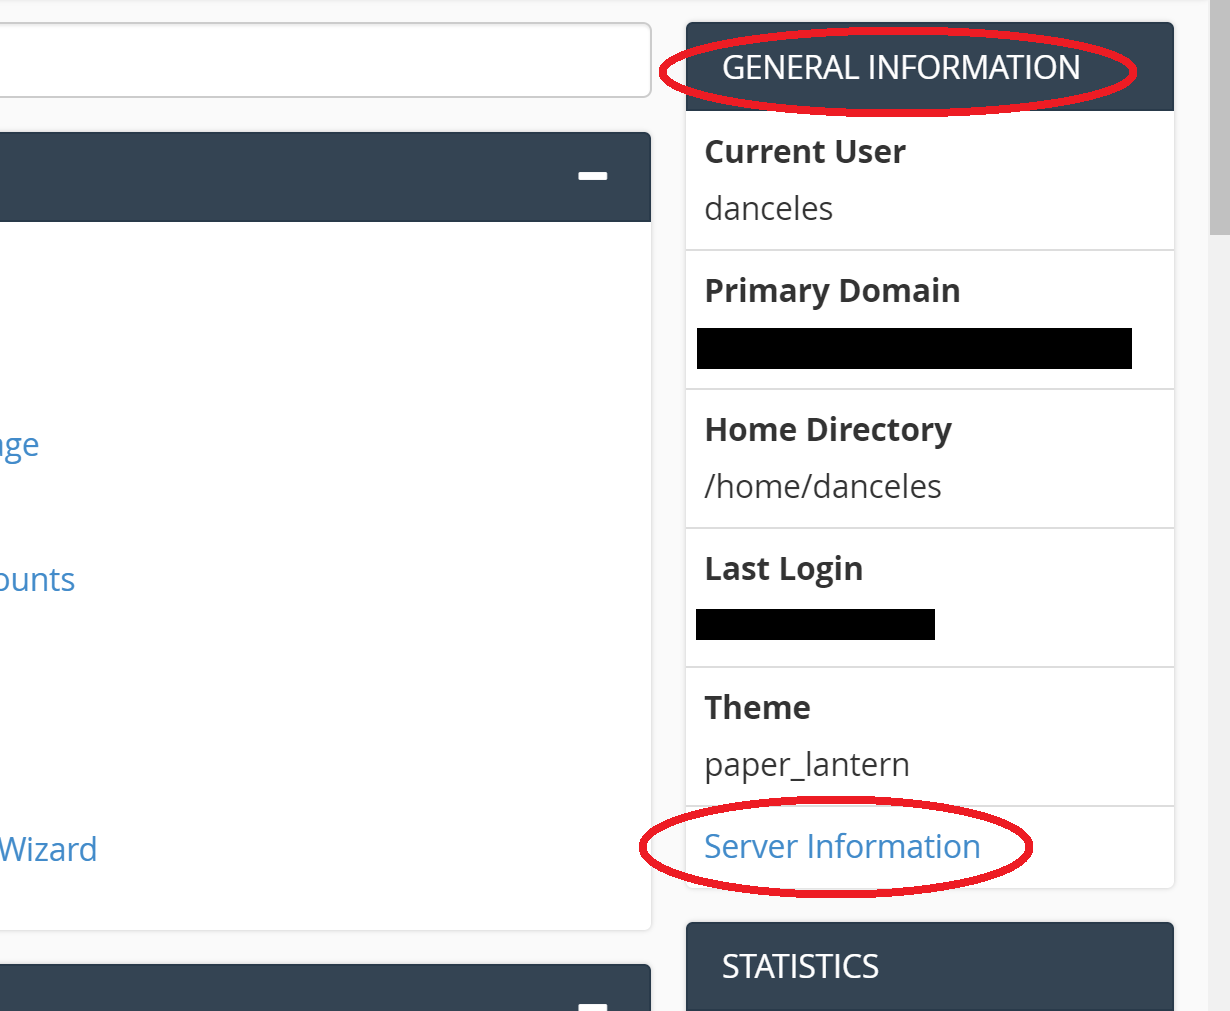
For other versions of cPanel, you can find the “General Information” box on the right-hand side and see the link called “Server Information” like this:
And here, you can get the Server Name as shown:
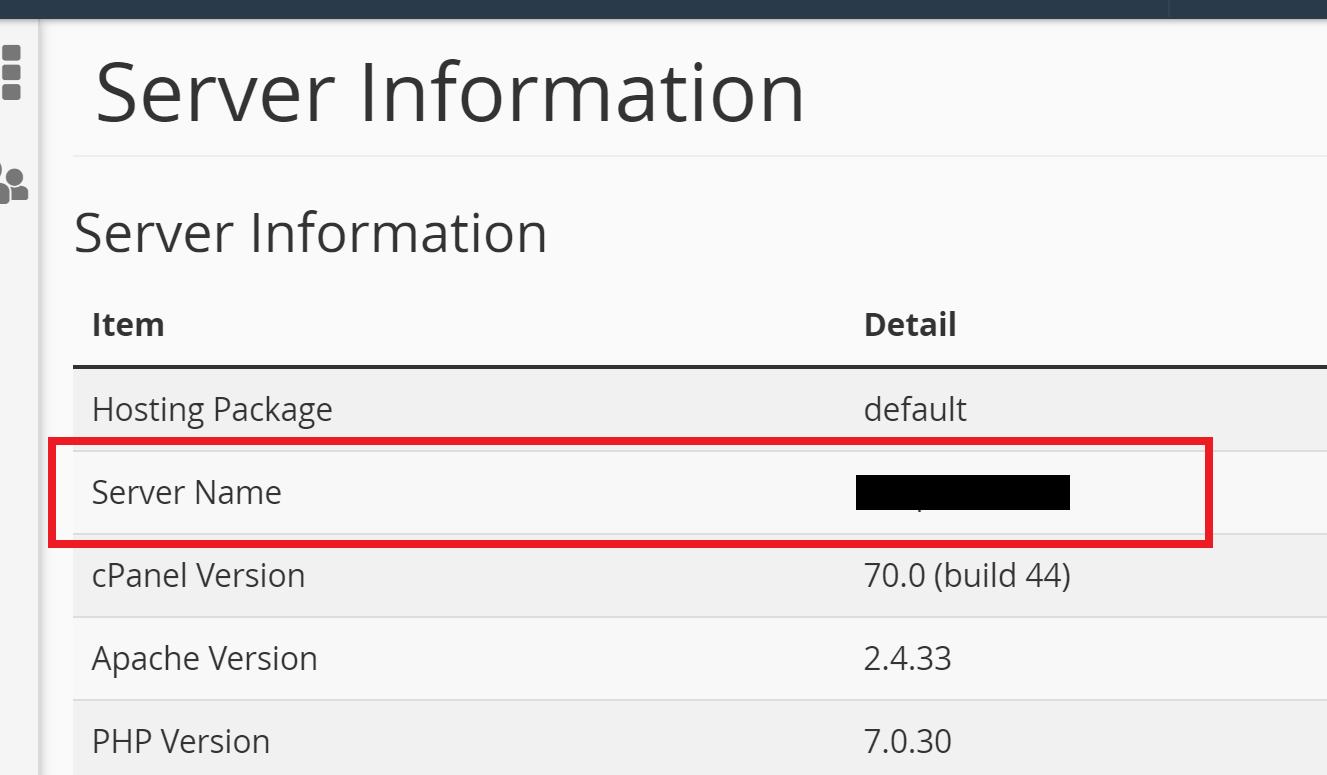
Now you need to append your hosting plan’s domain name to the Server Name shown above. So the final form will be something like this:
[server name].[domain name].com
Each hosting provider will have a different “domain name” with shared hosting. For this site of mine on SiteGround, the domain name is “siteground.biz”. For InMotion, it’s “inmotionhosting.com”. Other hosting providers have different names that you need to append to the server name.
The end result should be a Fully Qualified Domain Name (FQDN) of the form. It should look like a web address with a subdomain and an extension like “.com”, “.biz” or something like that.
Can’t Find the Hostname with Domain?
If you can’t find the extension to append to the Server Name, try and use your own domain name instead. Since your domain name is pointing to the server on which it’s located, it should work just fine.
Get the Port Number
Most of the time, the port number for an SFTP connection will be 22. However in some circumstances, the hosting provider might decide to change it to something else. Check your provider’s documentation to see if they have some other SFTP port. For example, SiteGround’s SFTP port is 18765. If you can’t find anything, just go with 22.
Get your SFTP Log-in Credentials
Most of the time, this will be the cPanel username and password that you use to log into your hosting’s cPanel. Sometimes providers might have a different combination, but in general this is the one you use. If it doesn’t work, check your hosting provider’s documentation to find out if it’s something different or not.
You should already have your private key password from Step 1, and your private key file from Step 2.
Step 5: Configuring WinSCP with the Credentials
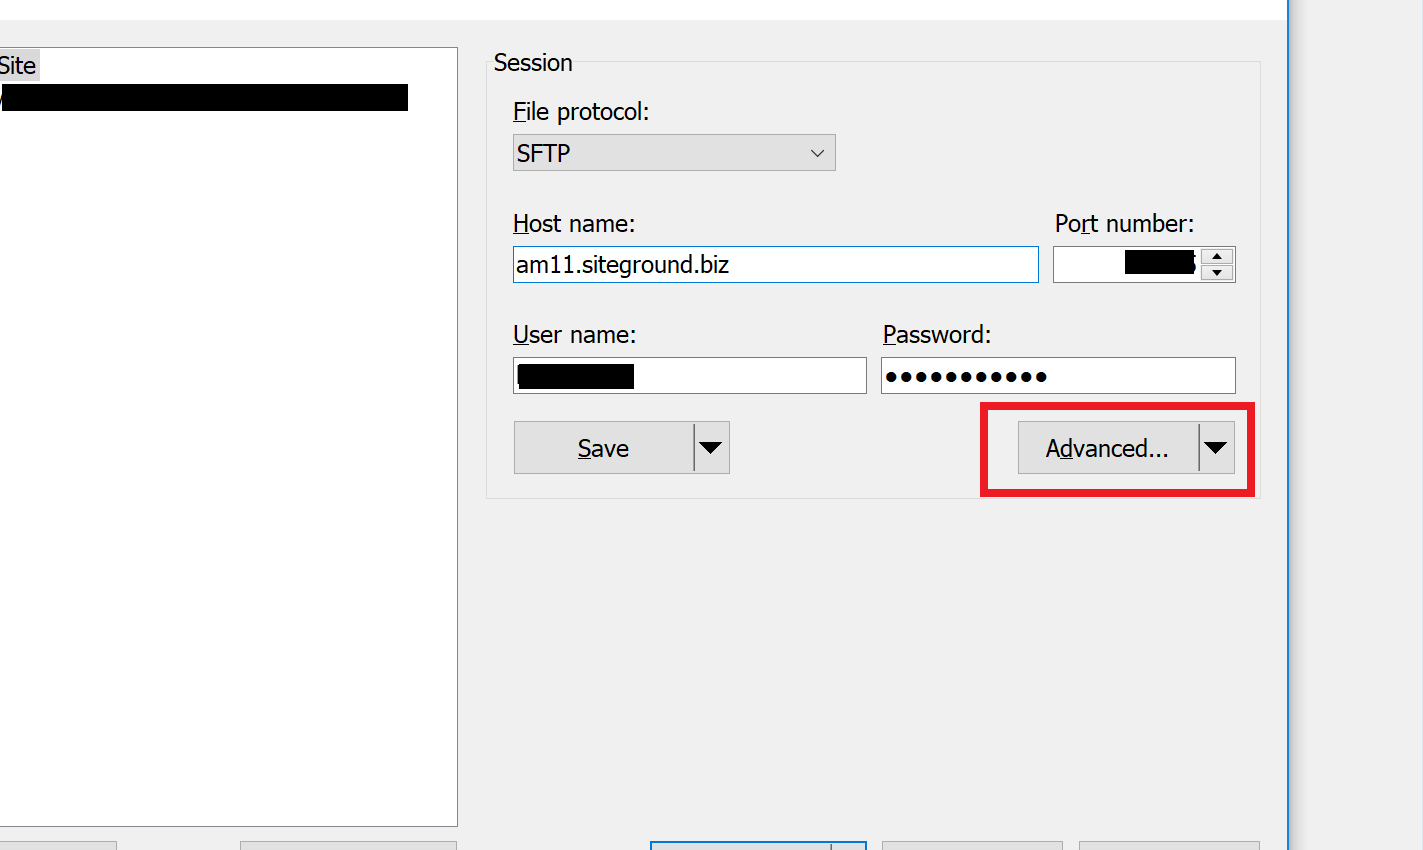
Fire up WinSCP, and in the “File Protocol” dropdown box, choose SFTP. In the “Host name” field, enter the fully qualified domain name you obtained in Step 3. Also enter the port number you got in the previous step (22, most of the time).
Enter your cPanel login name and password, and click “Advanced” as shown here:
Now we need to use our Private Key
Step 6: Configuring WinSCP with Our Private Key
In the “Advanced” dialog box, select “Authentication” under the “SSH” sub heading as shown below:

In the “Authentication parameters” subsection, we need to select the private key file from Step 2. Click the button with the three dots to open the file dialog box. Choose the option to show “All files (*.*)” and select the private key that you saved earlier in Notepad.
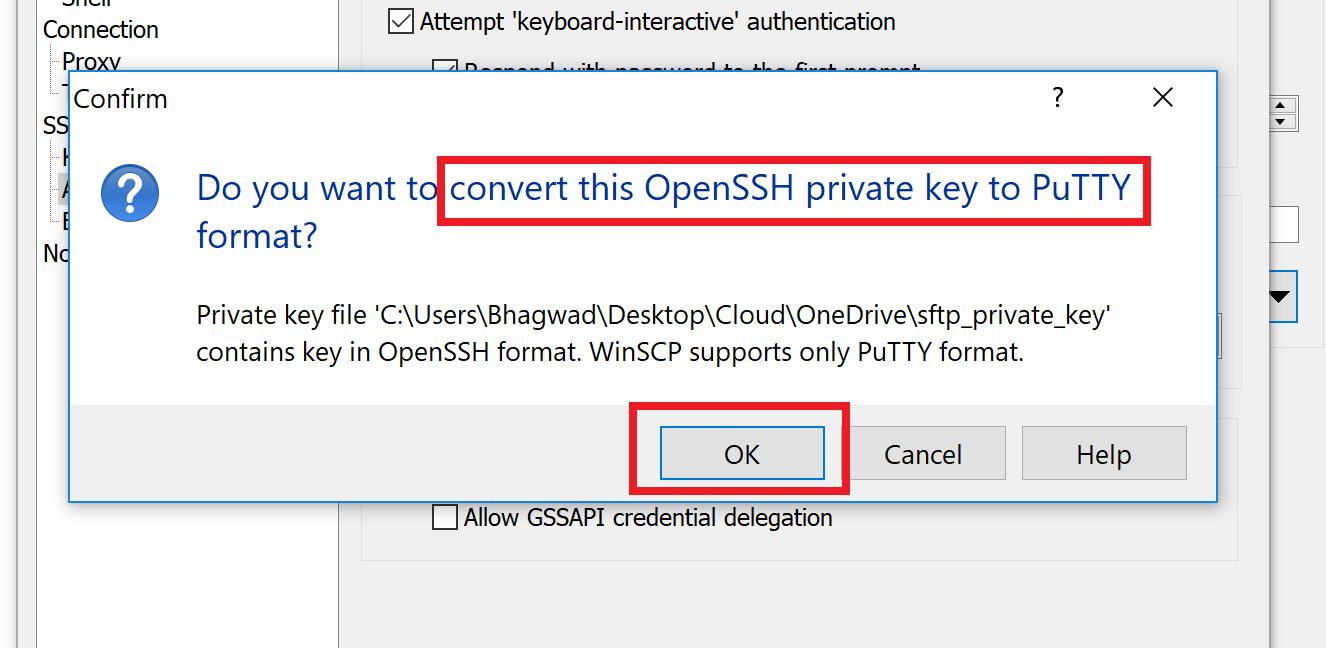
Now you’ll get a popup box asking your permission to change it to a PuTTy format. Click OK:
Now enter the passphrase for the private key that you used in the very first step to generate the key pair as shown here:
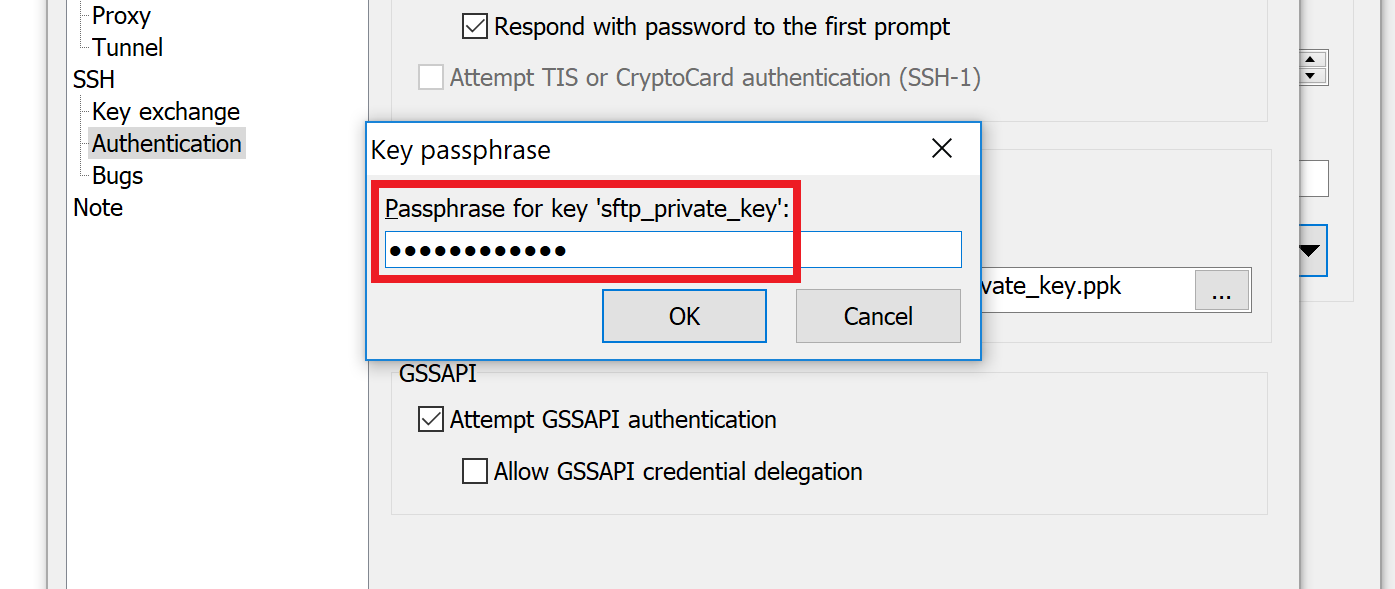
Save the new file with a “.ppk” extension (the standard for PuTTy files) and you’ve successfully imported your private key into WinSCP.
Step 7: Connect to your Server via SFTP
Save your advanced settings and you’ll be back to the main SFTP credentials scene that we saw in Step 4. Press the “Save” button to ensure that your settings will remain when you get back and you won’t have to do all this over again!

Now click the “Login” button at the bottom right of the dialog. This should show a pop up box asking you whether to add the host key to the cache like this:
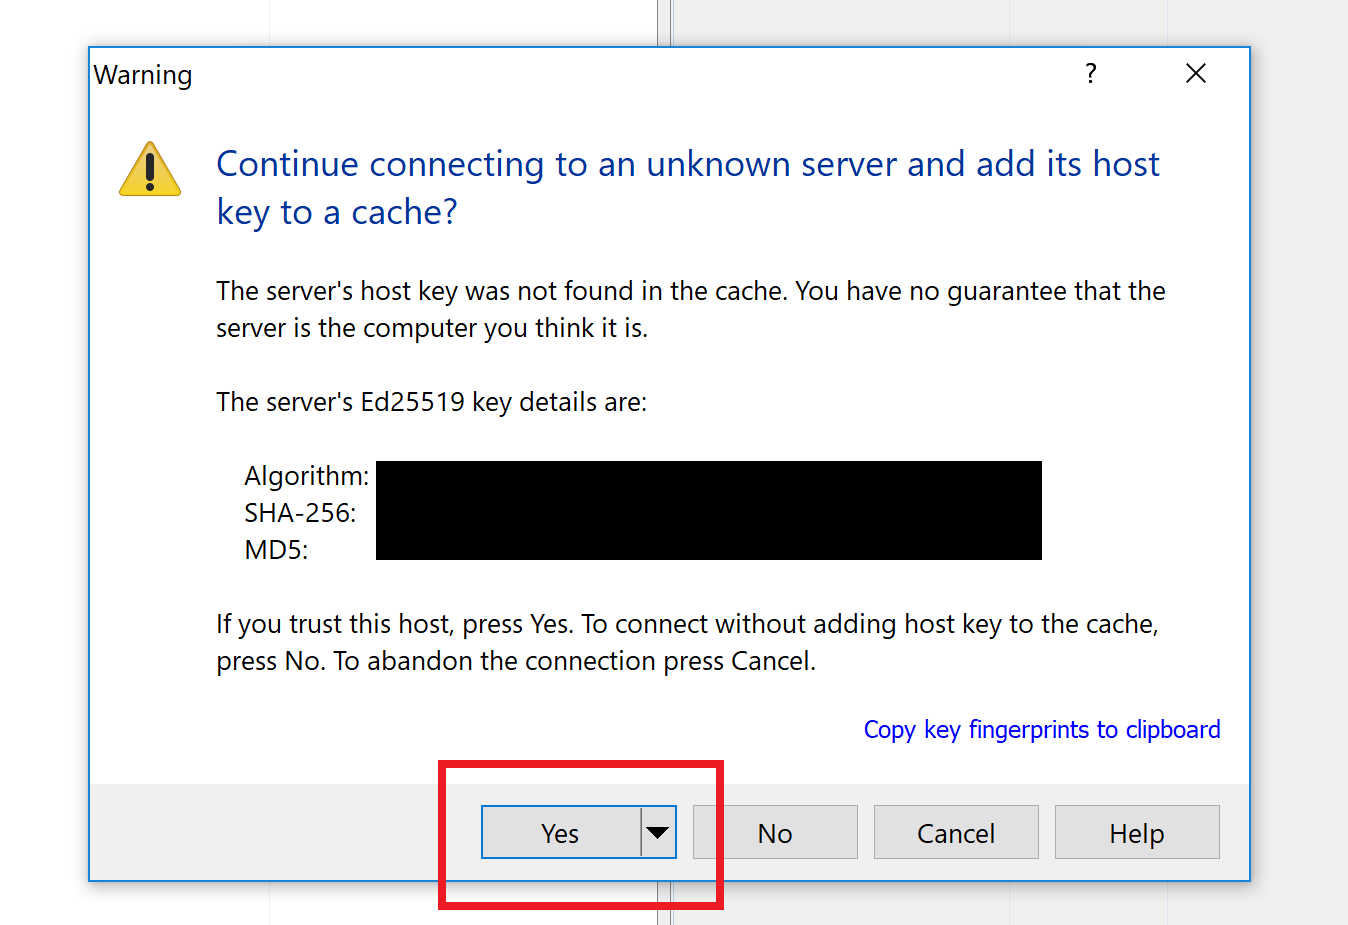
Click “Yes” to save the host key and connect. Now it should ask you for the private key’s password that you created in Step 1 again.
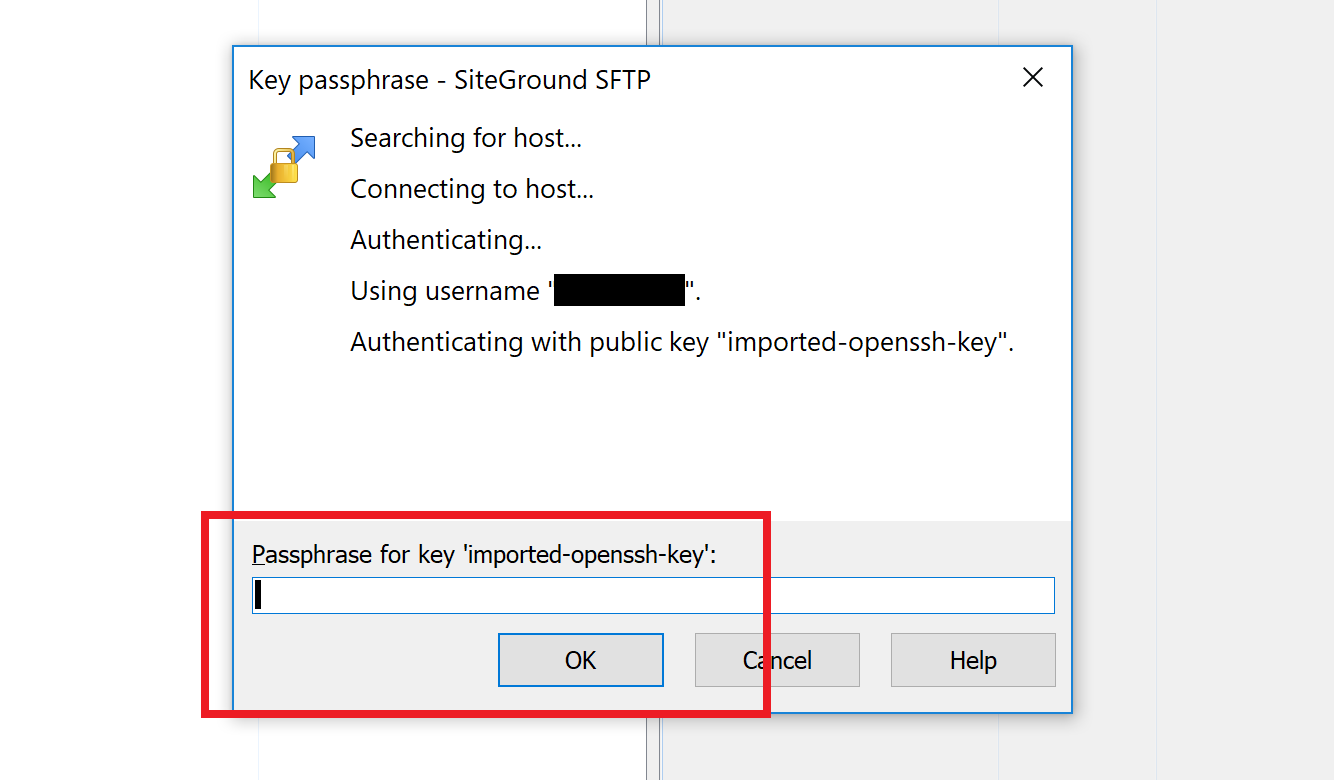
And once you enter the correct password, you should successfully connect!

And that’s it! You have now created a secure FTP connection between yourself and the server! Your passwords and data transfers are now entirely encrypted with strong SHA-256 bit data connectivity. You can’t get any safer than that!
thank you very much !