

Let’s say you scored a juicy backlink from a great site, and you’re waiting for Google to crawl it on its own – but it’s just not happening. Usually, you can use the Google Search Console to only crawl pages on your own site. But here’s a technique to force Google to crawl a third-party site.
Prerequisite to Forcing Google to Crawl a 3rd Party Site
For this tutorial, I’m going to assume that you’ve already set up a Google Search Console account and verified your site ownership. If you haven’t, you need to do that first. Even apart from this tutorial, it’s beneficial and Google Search Console has hands down the best keyword data for your site, far better than tools like Ahrefs and SEMRush since it’s not worth hiring an SEO “expert”.
Step 1: Create a Redirect from a Page on your Site
The way to make the Google Search Console crawl a page on a third-party site is to create a redirect from a non-existent page on your site to the third-party page that you want Google to crawl. So, for example, let’s say I want Google to crawl the following URL:
https://www.example.com/somethirdpartypage
I need to create a redirect to this page from a page on my site that doesn’t exist. For example:
https://www.wp-tweaks.com/test
If you’re on WordPress, I suggest downloading and installing the Redirection plugin. It doesn’t have to be permanent, and you can delete it afterward. Activate the plugin, finish the setup and create a new redirect from your test page to the 3rd party site like this:
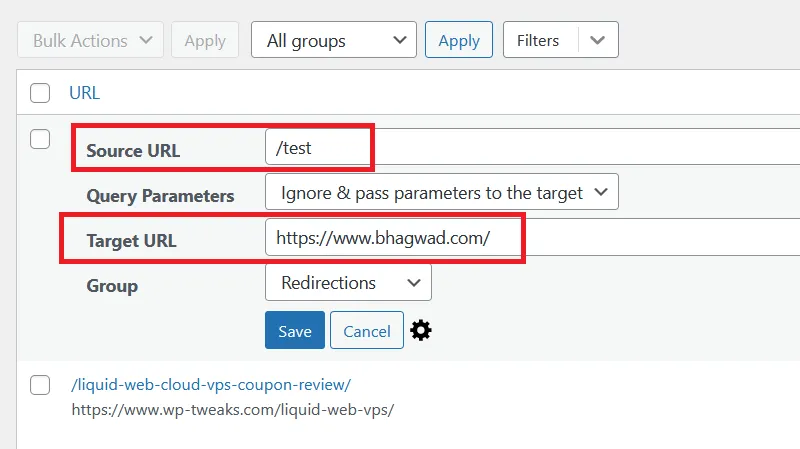
In the “Source URL” field, you can enter an absolute or a relative URL. I suggest an absolute URL as it’s easier, even though I’ve used a relative URL in the screenshot. In the “Target URL” field, type in the page URL of the third party that you want to force Google to crawl. Save your new entry.
Now test the redirect and make sure that it works. Once you’ve created the redirect, it’s time to make Google crawl it through the Google Search Console.
Step 2: Request a Live Test on Google Search Console
Open the Google Search Console for your site property, and in the top search bar where it says “Inspect any URL in”, enter the URL of the non-existent page on your site for which you created the redirect earlier and press “enter”. In a few moments, the tool will inform you that the URL is not on Google like this:
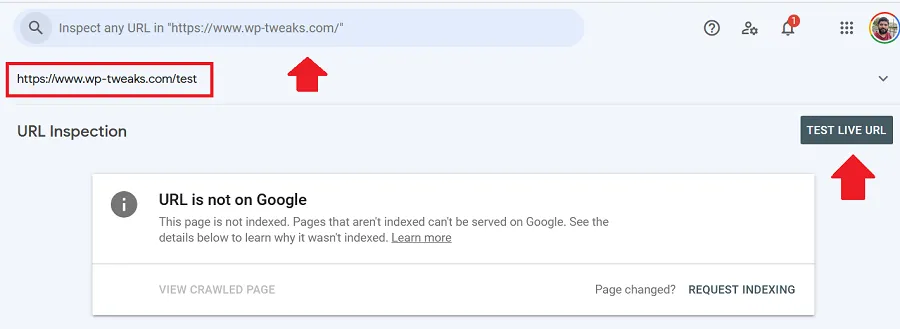
To ensure that the Google Search Console can process the redirect, click the “Test Live URL” button, as shown above. Wait a few minutes for Google to process the URL.
Step 3: Force Google to Crawl the Third Party Site
If all goes well, Google will finish testing the URL after a few minutes. Click the “View Tested Page” link, and a panel will open on the right-hand side with three tabs – HTML, Screenshot, and “More Info”. Click “Screenshot” to verify that Google is accessing the page on the 3rd party site like this:
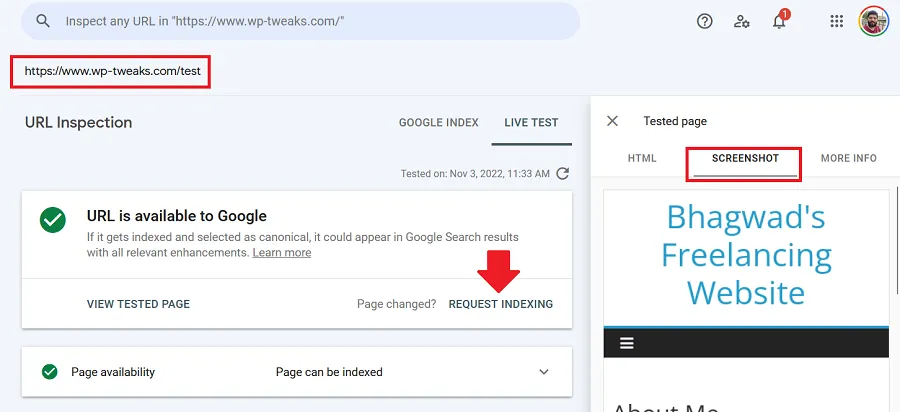
If the screenshot matches the page that you’re trying to index, then go ahead and click the “Request Indexing” link, as shown above. It should only take a few seconds, and Google will now crawl the page on the 3rd party site, even though you don’t have access to it directly.
Once you’ve initiated a Google crawl request for the 3rd party site, you should clean up the redirection plugin by removing it or at least deleting the redirect entry. I hope you found this tutorial useful!
I will test the method and then come back here to say if it worked.
not work for 3rd party