
Here are four ways to login to the HostGator cPanel area.
Table of Contents
Method 1: HostGator cPanel Login via Hostname URL
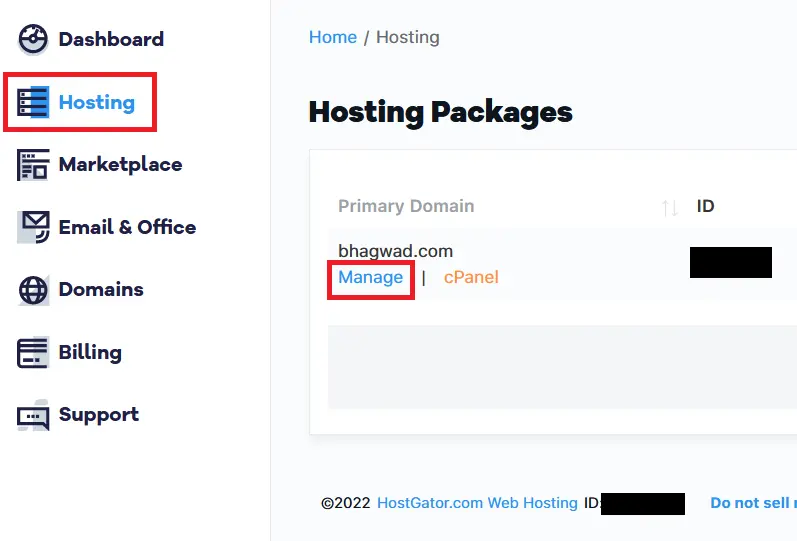
When you sign up for a HostGator package, the system assigns you a server hostname. To get the hostname, login to your HostGator dashboard and click “Hosting” as shown here, then click “Manage” next to the account whose cPanel you want to access:
On the next screen, click “Settings” and under the section titled “Server”, you’ll get the server name:
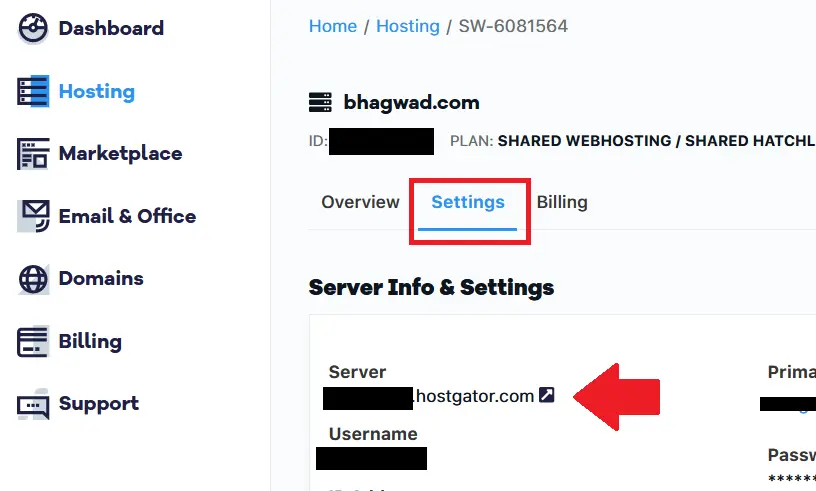
Clicking the small arrow next to the hostname will take you to the cPanel login page. Copy this URL and use it later to access cPanel for your chosen package directly. The URL will look like this:
https://xxxxxxxxx.hostgator.com:2083/
Just paste the above into your browser URL bar, and you’ll get the cPanel login page as shown here:
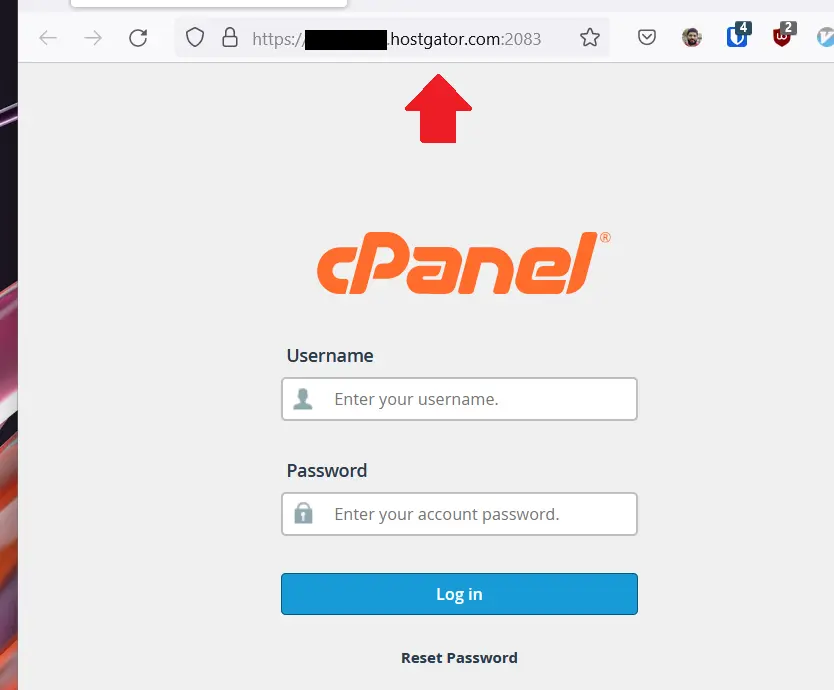
Logging in with the server name is safe because, unlike an IP address, it will never change, and you can safely use HTTPS without any warning notices.
Method 2: HostGator cPanel IP Address Login URL
The second method to directly login into your HostGator cPanel is using the IP address. There are two ways to get your HostGator IP address.
Alternative 1: Get the IP Address from the Package Settings
Like the previous step, after logging into your HostGator dashboard, click “Hosting” and “Manage” next to the package you want. In the resulting screen, you can find the IP address underneath the server and username as shown here:
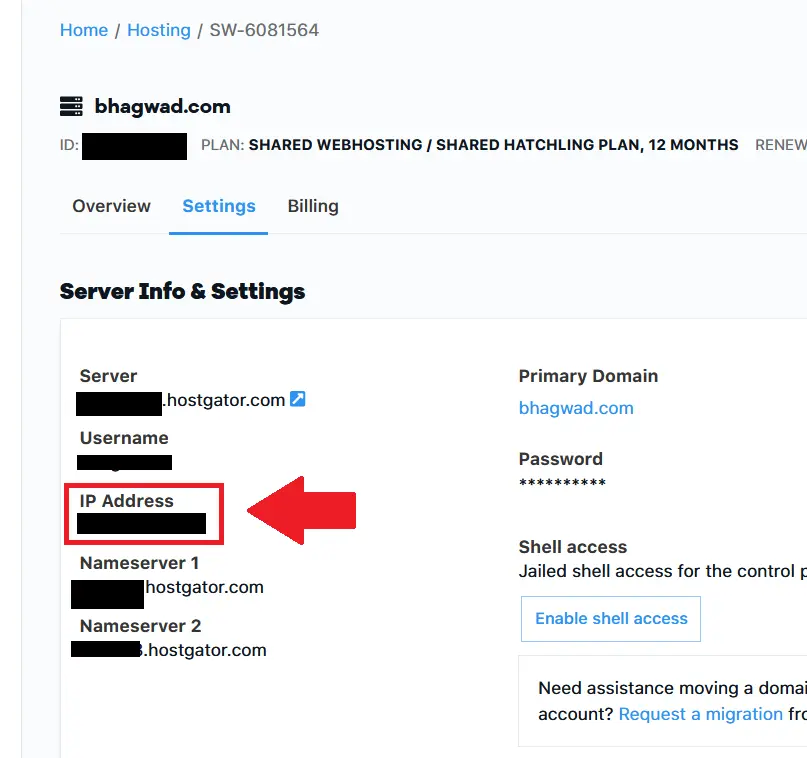
Make a note of the IP address as shown above.
Alternative 2: Get the IP Address from Within cPanel
The second place to obtain the HostGator IP address is from within cPanel. To do this, you must first log into cPanel using a method other than direct IP access, either with the server name, the domain name or through the HostGator dashboard. Once inside cPanel, you can find the IP address on the right-hand side, as shown here:
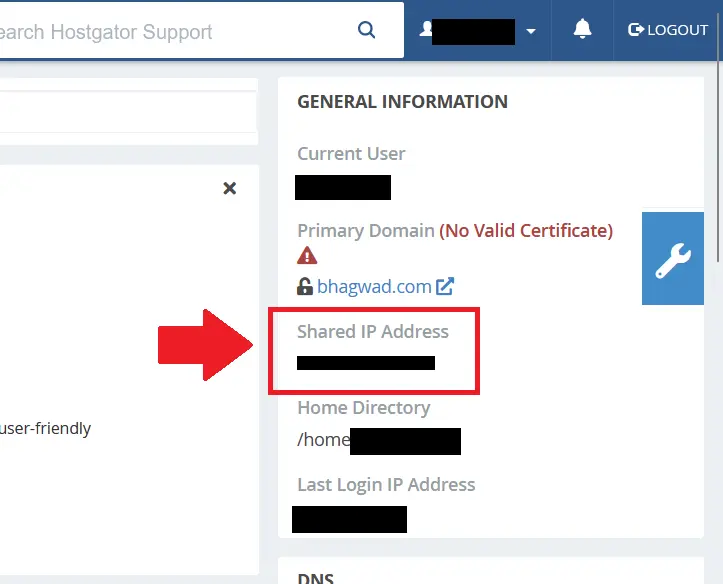
The “Shared IP Address” will give you your HostGator package’s current IP address.
Using the IP Address to Login to HostGator cPanel
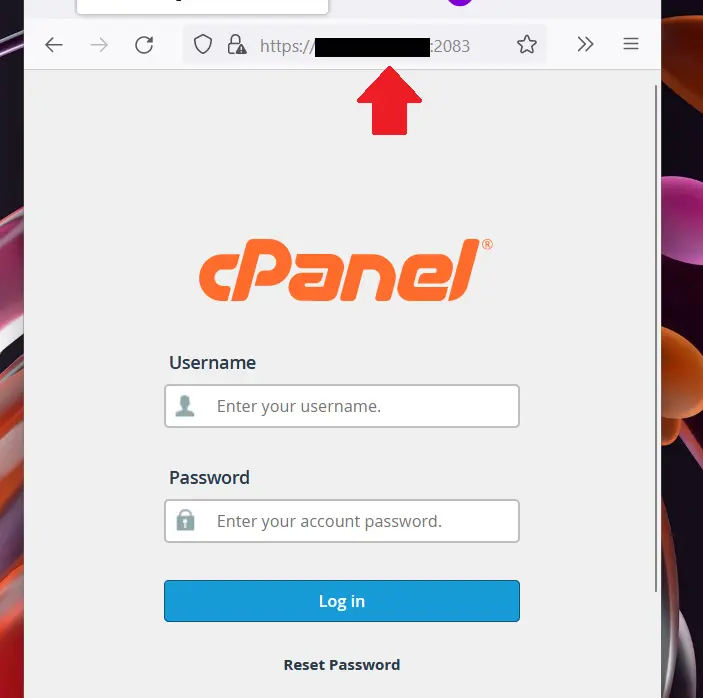
Once you have the IP address, you can reach the HostGator cPanel screen directly by typing the following URL into your browser’s address bar:
https://[youripaddress]:2083
This will lead directly to the cPanel login screen as shown here:
As before, you can find your username above the IP address and the option to reset your cPanel password.
Method 3: HostGator cPanel Domain Name Login URL
You can also login directly to your HostGator’s cPanel account using your domain name instead of your IP address. For example, you can access cPanel like this:
https://[yourdomainname].com:2083
For this approach to work, your domain name should point to your HostGator plan’s IP address. You don’t need to worry if you purchased your domain directly from HostGator, as this will happen automatically.
This is also better than Method #2 since you don’t have to worry about HostGator changing your site’s IP address. This doesn’t usually happen, but it can since you’re on a shared hosting account.
Method 4: Access cPanel from the HostGator Dashboard
You can also access cPanel directly from the HostGator portal without entering a username and password. To do this, sign in to your account after the HostGator provisioning process is complete, and click “Hosting”, and then “cPanel” under the package whose cPanel you want to access like this:

This way, you can access all your cPanel accounts from a centralized location without needing to save or remember the usernames and passwords for individual HostGator packages. This isn’t an issue if you have just one package, but it can get confusing if you have more than one service.
Which Method is Best?
I would choose Method #1 to log in to the HostGator cPanel because it always works, and it’s easy if you have just one cPanel account. If you use the IP address method, you risk HostGator changing your site’s IP address, and the domain name method can fail if you migrate that domain to another hosting provider. While you can always access cPanel from the HostGator portal, it’s very cumbersome.
So to be safe, always log in via the HostGator server name.
Accessing your HostGator cPanel Password
The HostGator documentation states that you receive your cPanel password in the welcome e-mail, but I didn’t receive it. Instead, you can access the password from your hosting dashboard by resetting it. To do this, log into the HostGator portal and click “Hosting” ->”Manage” ->”Settings”.
Below, you’ll find the HostGator cPanel password under the “Primary Domain” section. It’s hidden, but you can click the “Reset” button to use whichever password you like:
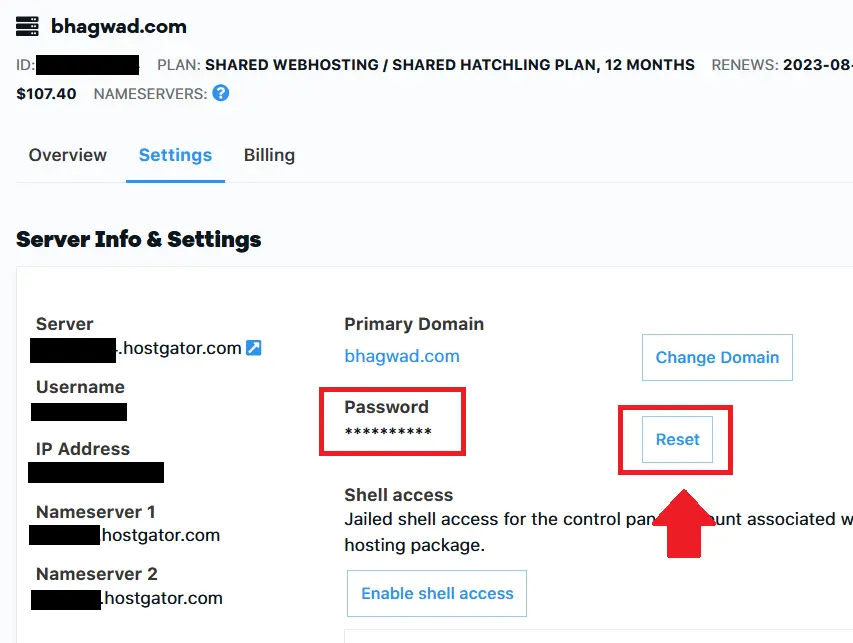
Save your new password in a safe location and use it to log in to cPanel directly.
HostGator cPanel Webmail Login – Use 2096 Instead of 2083
To directly login to the HostGator cPanel Webmail system, use any of methods 1, 2, or 3, and replace “2083” with “2096”. So example, webmail logins will be:
https://xxxxxxxxx.hostgator.com:2096
https://[yourdomainname].com:2096
https://[youripaddress]:2096
Any of these will take you straight to your webmail, as shown in this screenshot:
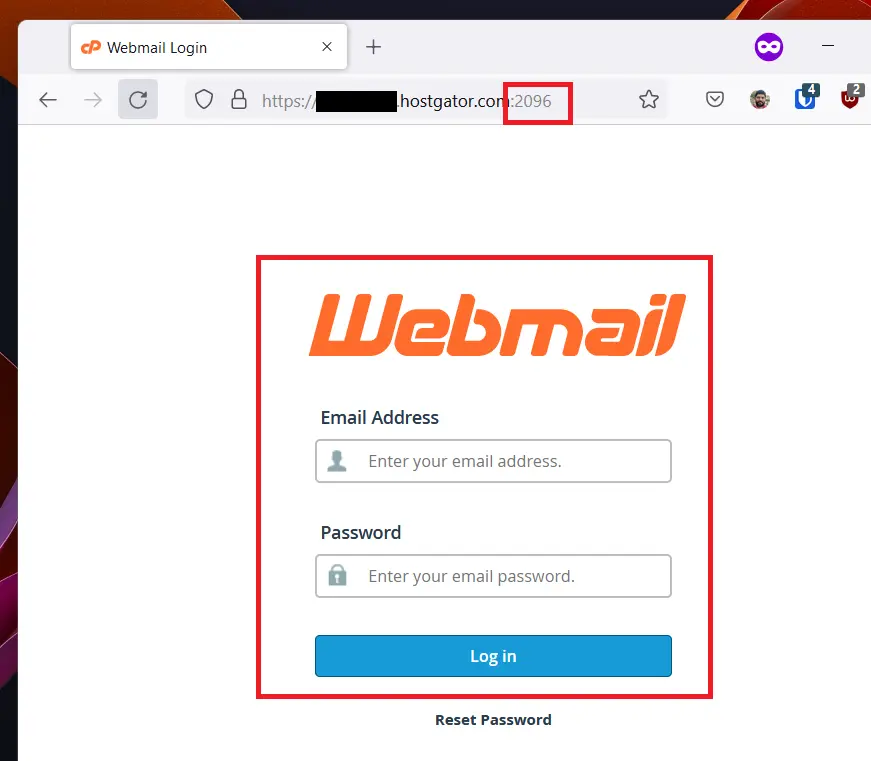
Enter your username and password for the e-mail account you want to check, and you’re ready to go. The next step is to upload your site to HostGator if you’re switching web hosts.
Final Thoughts
I’ve done my best to cover all the different ways you can login to your HostGator account’s cPanel dashboard. Find one that works for you, and stick with it!
Speak Your Mind