
This article will show you how to set a default Facebook image for your WordPress post. When you share it on your own, you might be able to choose the image from the options, or upload a new one. But you have no control over how it might when someone else shares your content. Luckily for us, Facebook allows us to include our preferred image in the HTML. Here’s how to make it work in WordPress.
Table of Contents
Step 1: Basics of the og:image Meta Tag
When deciding which image to use, Facebook will search for the following line in your page’s HTML:
<meta property="og:image" content="[image url]" />
If it’s present, it will use the image referenced by [image url] as the “thumbnail” or the default image. So the challenge in WordPress is how to include this information in the <head> area of our HTML. We’re going to do this using custom fields.
Step 2: Insert the Following Code into functions.php
If you don’t know how to insert custom code into WordPress, read this tutorial first. Then, paste the following into either your custom PHP plugin, or your theme’s functions.php file:
function wp_tweaks_set_facebook_image() {
	$output = '';
	if(get_post_meta(get_the_ID(), 'facebook_image', true) && is_single()) {
		$output = '<meta property="og:image" content="'. get_post_meta(get_the_ID(), 'facebook_image', true) .'" />';
	}

	echo $output;
}
add_action('wp_head','wp_tweaks_set_facebook_image');
Step 3: Enable Custom Fields in the Gutenberg WordPress Editor
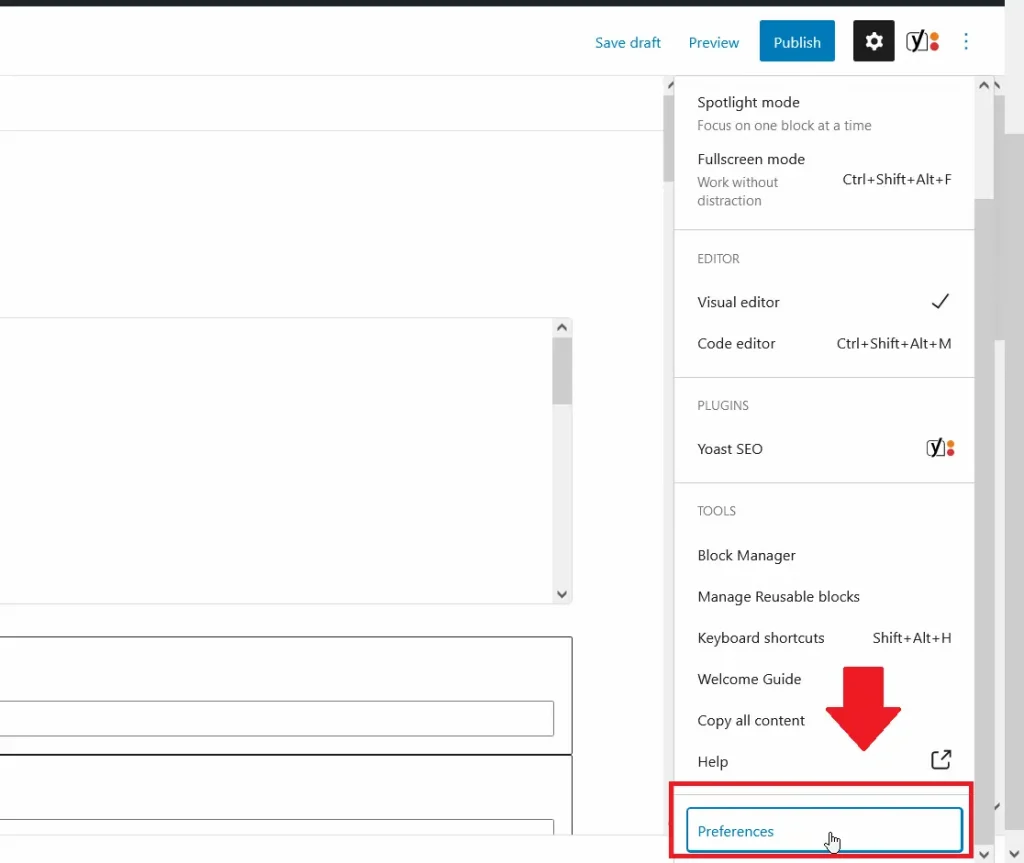
When you compose a post in WordPress, you can enable additional options by clicking “Preferences” from the WordPress Gutenberg settings:
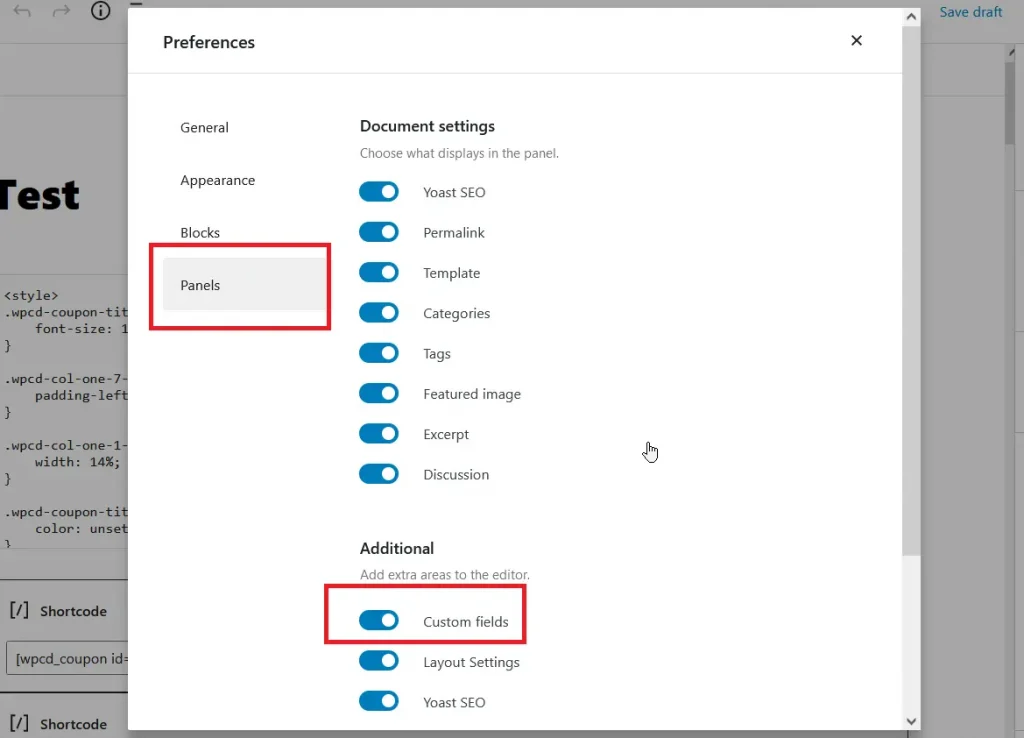
This will bring up a number of fields that are disabled by default. One of the most useful is called “Custom Fields”. Enable the checkbox:
Step 4: Specify the URL of the Default Facebook Image
With custom fields enabled, scroll down the WordPress editor. You should see a new section called “Custom Fields”. This will have two textboxes – “Name and Value”. You may have to click a link called “Enter New” if you see a drop down box for the “name” field instead of the a text box. In the “Name” section, type:
facebook_image
In the “Value” section, enter the URL of the image you want Facebook to pick up. This doesn’t have to be an image on your site. In fact in the example below, I’ve used a free image hosted on the Wikimedia commons page:
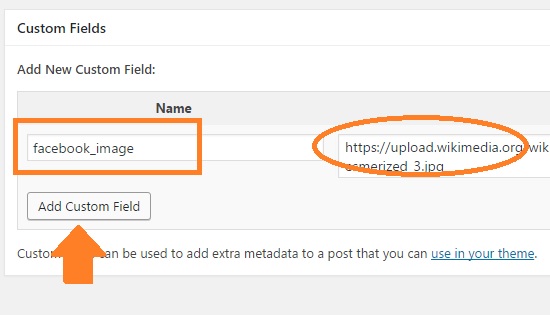
Now click “Add Custom Field” as shown here. This will add the name/URL pair to your post. Save your post and publish it. If all goes well, your HTML should now contain the og:image tag for Facebook to recognize.
Step 5: Testing if the Default Facebook Image is Set
It’s important to check and verify if Facebook has indeed picked up your image. Sometimes, it’s necessary to force Facebook to read your meta information. To do this, use this official Facebook sharing debugger. . In the URL field, paste in the URL of the post that has the image attached to it.
And then click “Debug” as shown above. This will extract all the meta data from your WordPress post (from any URL actually), and display it below. If all has gone well, you should see your selected image displayed along with the post under the section “Link Preview”:
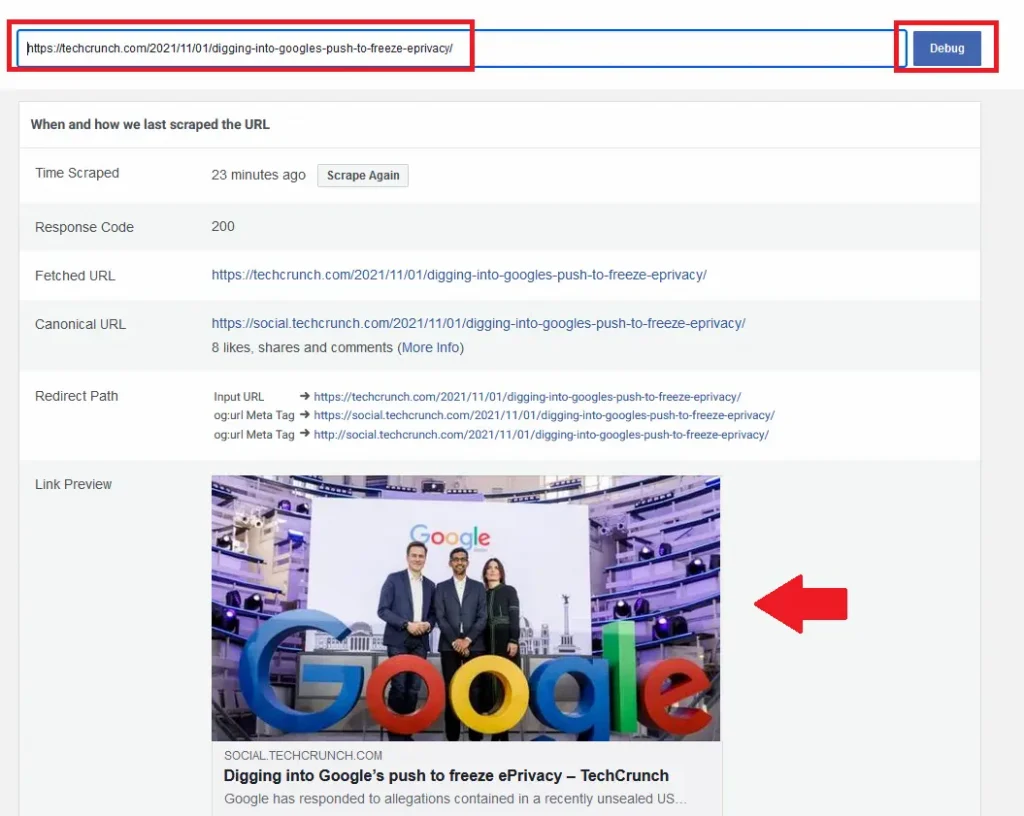
You can see that the custom image URL from has been included along with my post. The code that we inserted in Step 1 picked up the custom variable name/URL pair and outputted an og:image meta tag in the head of the WordPress post that set the default Facebook image.
Note on Image Dimensions
If you want your image to display in super high resolution on all devices, try and size your images to the following dimensions:
1200 x 628 pixels. Or,
Height = 1200px
Width = 628px
If you can’t obtain these sizes, then at least try and make the length of the image 1.91 times greater than the width. In other words, the image dimensions should be in the ratio 1.91:1. The ratio will ensure that you get a “full sized” image under your post instead of just a small thumbnail. The actual size of the image can be much less, as long as the ratio is at least close to 1.91:1. This way, your posts will have the maximum impact when shared on Facebook.
Speak Your Mind